


Build the curriculum around what the learner can demonstrate at each stage. Flat silicone makes it possible to isolate a line, a boundary, or a small coverage change. Shaped models introduce changing contact angles, landmarks, and access. A supervised live-model assessment adds real tissue, client communication, infection-control decisions, and legal responsibilities. Each stage earns its place because it shows the instructor something the previous one could not show.
For a universal-cartridge PMU course, begin with a fine liner, compact shader, and flat sheet. Add the anatomical surfaces for the techniques you actually teach. Buy a complete powered setup when a student needs a compatible machine, and offer a consumables-only route to learners whose existing equipment meets the assignment. Set the staffing and licensing conditions for live work before advertising any session that includes it.
Contents
- Design the course around observable skills
- Set up the flat silicone stage
- Build the anatomical model stage
- Plan the move to supervised live work
- Score the work and calibrate assessors
- Buy equipment and supplies by station
- Run a cohort and improve the next one
- Frequently asked questions
Design the course around observable skills
Start with the graduate's first working decision
Write the result of the course as something a graduate can do and explain. A beginning brow learner might need to map a shape, keep a readable boundary, and select different tools for a defined mark and a soft shaded passage. A tattoo learner might need to check a transferred design, place a coherent outline, and keep an open gap clear while working a compact fill. Those outcomes tell the instructor what to teach and the buyer what to buy. A list of equipment names gives the learner less information about how the pieces fit together.
Separate anatomy, technique, and professional conduct
The curriculum should show which parts of the work are about visual placement, which are about operating equipment, and which belong to client care and infection control. Build different observations for each. A clear result on a flat sheet can show a repeatable line. It cannot show how the learner handles a client question or a change in access on a curved area. A well-staged simulated workstation can reveal how the learner deals with a used item before the academy introduces a live assessment. Maintain that separation when deciding why a learner needs another lesson.
Define what changes between stages
Keep the visual intent familiar as the practice surface becomes more demanding. The learner can begin with a short contour on flat silicone, then find the same type of edge on a curved model. Later, an appropriately supervised learner can apply the relevant judgment in a live setting under the school's approved procedure. A progression becomes easier to teach when the learner recognizes the skill being transferred. If the tool, technique, task, and surface all change together, the assessor may have trouble identifying what caused the difference.
Explain the limits of the course certificate
Explain what the academy observes and what its completion document means. Local law and the requirements of the location determine whether a person may perform a particular service and under which conditions. For example, Florida includes permanent makeup, micropigmentation, and microblading within its tattooing program. Verify current rules for the service, artist, instructor, and premises before describing any live-model activity in the course materials. Give the learner separate information about how to find the applicable licensing pathway after graduation. Florida Department of Health tattooing program
| Course stage | What the learner demonstrates | What the instructor observes | Next decision |
|---|---|---|---|
| Flat 2D practice | Defined marks and controlled coverage on a common surface | Consistency, shape, and grouping choice | Repeat or introduce a curved form |
| 3D anatomical model | Placement and access around a changing surface | Working angle, visibility, and repositioning | Target the difficult region before live assessment |
| Simulated appointment | Setup, interruption, cleanup, and communication | Safe movement and complete workflow | Confirm readiness and applicable authorization |
| Supervised live assessment | Conduct and technique within the approved scope | Client response, supervision, and criteria | Continue, pause, or arrange remediation |
| Post-course review | Explain a decision using observed work | Ability to apply feedback | Recommend the next supervised learning task |
Set up the flat silicone stage
Run a first-day tattoo outline-to-fill exercise
Prepare a simple flash outline with one broad opening, one narrow turn, and one negative gap. Each learner transfers the same design at the same size, then compares the proof with a reference. The instructor observes whether the learner can locate the two key junctions before starting. If the transfer has a missing edge, the learner repeats the transfer and explains why the correction comes before line work. This makes the failure easy to locate and gives the group a shared visual reference for the later fill exercise.
When the students reach coverage, give them a small field that can be completed with the assigned compact shader. Ask them to stop and inspect the remaining open gap before they finish the last section. Discuss whether the footprint is appropriate and where the student wants to approach the boundary. A learner who can describe why the final area needs a smaller mark has demonstrated a procurement decision along with the visible result. On the second attempt, let the learner choose the order of the two tasks and explain what changed.
Review the exercise at a distance where the design first becomes recognizable. A very close inspection can emphasize an individual mark while hiding the broken gap that makes the design difficult to read. Compare the first and second attempts together, and invite the learner to name the change before the instructor gives a score. End with a short correction the learner can practise on the remaining area of the same sheet.
Use a common reference and a common surface
Give the cohort the same size and intended shape for the initial exercise. A shared surface and comparable task help the instructor see whether differences come from the learner's mark, the chosen grouping, or a setup problem. Use an ATTO A4 silicone practice sheet where a flat surface meets the assignment. Plan enough space for a first attempt, feedback, and a second attempt that can be compared directly. Keep one completed demonstration available for students to inspect from their normal working position.
Teach a line with a beginning, turn, and endpoint
Choose an exercise long enough to show how the learner starts, follows a short curve, and finishes. The instructor can show how to look ahead along the line and reposition before reaching a point the learner cannot see clearly. In brow training, the exercise might use a small set of repeated directional marks. In tattoo training, it might use a simple contour with a deliberate opening. Score the relationship to the drawing and the consistency of the visible mark. A learner who can explain a difficult turn has more useful information for the next attempt.
Teach coverage within a defined boundary
Assign a small area with a clear shape and at least one open feature that must remain visible. A Pinky Pro single liner can demonstrate the focused role, while a Pinky Pro compact round shader covers a different footprint. Explain why the grouping fits the task. Look at the whole shape before examining individual marks. An even-looking patch that crowds the opening has missed part of the assignment.
Teach tattoo transfer as a separate checkpoint
For a stencil-to-fill lesson, check the transfer before asking the learner to run the pen. The outline needs to retain the edge, any gap that must stay clear, and the landmarks that organize the design. A damaged transfer can make a capable learner look inaccurate. The U9 Tattoo Practice Kit supplies its machine, starter cartridge roles, synthetic skins, and True Black practice ink for a synthetic tattoo exercise. Plan stencil reproduction and transfer supplies separately. Keep this practice ink with the synthetic training equipment.
Change one element during remediation
When a learner repeats an exercise, change the factor that needs attention. If the line fails at the turn, keep the starting setup familiar and let the learner rehearse the approach to that turn. If the grouping crowds the target, compare a more suitable footprint while preserving the drawing. A repeat with several simultaneous changes can look better without teaching the learner why. Give a specific observation, identify one adjustment, and compare the resulting mark at the same distance.
| Flat exercise | Common starting materials | Observation | Useful correction |
|---|---|---|---|
| Straight line and short curve | Flat sheet and focused grouping | Start, turn, and endpoint | Rehearse the one difficult transition |
| PMU contour into shade | Flat sheet, liner, compact shader | Boundary, coverage, and open area | Change the grouping or movement that crowds the edge |
| Tattoo stencil into fill | Practice kit and separate transfer supplies | Accuracy of transfer and readable fill | Fix the earliest stage showing the problem |
| Repeated directional marks | Consistent reference and matching surface | Spacing and direction | Compare a second attempt on the same layout |
| Simulated interruption | Prepared station and replacement stock | How clean supplies are retrieved | Change staging or repeat the pause routine |
Build the anatomical model stage
Give the lip learner a second setup with the same objective
Start with an instructor demonstration on the same model shape the student will use. Show where the model sits and how the landmark remains visible when the learner changes position. Give the first attempt a small, defined coverage area beside a clear part of the outline. Once that attempt is complete, reposition the model and ask the learner how access changes. The exercise should reveal the learner's ability to prepare the working position before asking for a more complicated pattern.
If the learner loses the boundary on the second attempt, examine the actual viewing angle and the available space around the turn. Ask the learner to show which part was hidden and what they would change in the setup. A shorter exercise at the difficult location can let them rehearse that decision. The learner can then repeat the original assignment and compare it with the first attempt. This progression gives the instructor a clear basis for deciding whether the problem came from positioning, grouping, or the shape of the movement.
Choose a model that introduces a useful constraint
A 3D model earns a place when the learner must solve a problem that does not arise on a flat sheet. Curvature changes how the hand approaches the surface and what the learner can see. An anatomical reference adds a placement decision. Select the model by the constraint the lesson introduces. A brow model can help an instructor discuss changes in direction across the arch. A lip form can help the learner separate work near a raised edge from coverage across a curved interior. Use a model whose shape matches the job rather than filling every station with unused forms.
Use a shaped lip to teach access and orientation
Set a contour and a small coverage assignment on the ATTO shaped silicone lip model. Ask the learner to locate the landmarks from the working angle and explain where they will reposition to maintain visibility. The instructor can show how a focused mark behaves as the curve turns away and how a compact shader fits inside the planned area. Compare the outline and coverage separately. The model gives the learner a way to rehearse access and orientation without making an assumption about the response of living tissue.
Build the brow exercise around changing direction
Start with a mapping reference that can be seen from the learner's position. Use a shaped surface to show why direction and spacing can change around a curve. For a machine hairstroke assignment, ask the learner to compare the start, flow, and termination of the pattern at two regions. For a powder brow assignment, show how the coverage role changes near the edge. Maintain an open area where the design needs it. The assessor should be able to point to the place where the curve changed the decision.
Use eye models for positioning and visibility drills
An eye model can introduce close boundaries, small working areas, and the need for a clear view. Use the model to teach the permitted simulated task, such as identifying landmarks, arranging the station, and demonstrating access with the selected tools. Establish separate prerequisites and supervision for any live eye procedure. A successful model drill supports the next discussion about positioning and equipment. Actual authorization and professional supervision follow the governing rules and the school's established assessment process.
Make the flat-to-shaped transition visible
Ask each learner to compare their flat and shaped attempts. Identify one change in viewing angle, one change in how the tool approached the mark, and one place where the design needed more room. Keep the comparison grounded in the actual result. A contour may look clear from above while becoming hard to follow from the ordinary working position. Let the learner adjust the setup and make a second attempt. That exercise prepares them to explain when a different placement or grouping serves the work.
| Model exercise | Constraint introduced | Passing observation | When to repeat |
|---|---|---|---|
| Shaped lip | Curved edge and raised surface | Clear access and separation of contour from coverage | Mark is visible from only one awkward angle |
| Shaped brow | Change of direction around an arch | Learner explains mapping and preserves intended spacing | Pattern loses direction across the turn |
| Eye model | Close boundaries and narrow access | Safe simulation setup and visible landmarks | Learner cannot see the intended working area |
| Wrapped tattoo form | Curvature around a larger placement | Transfer remains aligned across the chosen view | Critical junction shifts after positioning |
| Flat comparison | One controlled baseline | Learner identifies what the curve changed | Differences cannot be explained from the evidence |
Plan the move to supervised live work
Walk through the appointment without a procedure first
Use a simulated appointment to see where communication and bench work interact. The learner explains the planned service and shows which reference they will use. The instructor then introduces a plausible interruption, such as a needed replacement supply or a request to pause. Observe how the learner makes the station safe, where clean replacements come from, and which person should answer the model's question. A simulation should feel close enough to the actual working sequence that the instructor can act on what they see.
If the interruption exposes an unclear responsibility, fix it before scheduling the next live assessment. For example, one person may have been responsible for both supervising the procedure and answering arrival questions from another room. Designate a separate contact or reduce the number of simultaneous activities. Make the approved role clear to the learner and the model. The benefit is a realistic next assessment where the instructor can focus on the learner's decisions.
Resolve the jurisdiction and premises before advertising
Identify the service, address, operator, instructor, and student roles. Check the rules and any required permissions with the relevant authority before taking bookings or promising live work in a course. A learner applying pigment and an observer may have different obligations. Confirm who is eligible to perform the procedure, where it may take place, and which supervisor is responsible. In an off-site course, check the temporary location requirements separately. Document the answer for the actual venue and the proposed activities. Florida tattoo establishment requirements
Assess workstation readiness before technique
Have the learner set up a station and demonstrate the studio's response to an interruption. Observe where unopened supplies are stored, where sharps are disposed of, and what happens if the learner needs another item mid-service. The exercise should include hand hygiene, barriers and protective equipment, and the route for used items. If staff have covered occupational exposure, their employer's responsibilities follow the applicable standard and Exposure Control Plan. Keep the requirements for the premises and the employer visible during course preparation. OSHA tattoo and body piercing interpretation · OSHA bloodborne pathogens standard
Describe supervision and model participation clearly
Before a live session, tell the model who will perform the procedure, how the instructor will supervise, and how the session can be paused. Use the academy's applicable intake, consent, and aftercare procedures. Confirm what preparation and documentation are required under the governing rules. Arrange instructor coverage around the actual number and type of procedures. Give the supervisor a clear way to intervene. Live work adds client communication and professional judgment to the same visual choices the learner practised earlier.
Set stop points before the session
Identify conditions that call for a pause, such as a compromised setup, an unresolved authorization question, or a learner who cannot maintain visibility and control. Agree who decides whether work can continue. A pause should allow the instructor to address the issue without requiring the learner to improvise. When the course cannot provide the required conditions, continue with appropriate simulation or move the assessment to a suitable session. Keep the learner informed about which observed skill needs further practice.
Build a path back from an incomplete assessment
Tell learners what happens if the instructor calls a stop or marks a skill for another attempt. Give a targeted exercise linked to what the assessor observed. A person who lost an outline around a curve might return to the shaped model. A person who had difficulty handling a clean supply request can rehearse the interruption routine before another assessment. Separate feedback on the visible result from the reason for the stop. That distinction helps the learner see what will be reviewed next.
Score the work and calibrate assessors
Compare two near-threshold examples as a group
Choose one example with a strong visual result and a weak setup decision, and one with a sound setup but inconsistent control of the mark. Ask the instructors to score the same criteria and describe the next action. The first learner may need another workflow simulation before progressing. The second can repeat a specific mark on the appropriate surface. Compare how the instructors handle those cases. If the academy can give the same remediation for the same observed reason, learners are less likely to receive conflicting advice between sessions.
Make the target visible to the learner. Show the part of the drawing that must stay open and the expected working view for the chosen model. If an instructor accepts a different approach, explain how it still meets the objective. This gives experienced learners room to use sound techniques while keeping the comparison fair. Save appropriate examples of both acceptable variations so the next assessor has concrete evidence for the decision.
Use criteria that describe visible behavior
Define the result in terms another instructor can observe. For a contour exercise, state whether the learner follows the planned boundary and preserves the assigned opening. For a shaped model, state whether the learner maintains visibility and repositions deliberately. For a simulated station, describe how clean supplies are handled during an interruption. Avoid scores based on overall impressions alone. Two instructors should be able to explain why an attempt met a criterion using the same piece of evidence.
Keep safety decisions distinct from visual scores
A well-formed mark and a safe workflow answer different questions. If the exercise includes a step that requires a pause for safety, use the academy's defined response even if the visual result looks strong. Assess the setup and the artwork separately. The learner needs to know what they did well and what must change before the next attempt. This makes it easier for a second instructor to take over the remediation and see why a particular stage remains open.
Calibrate on a shared example before class
Give instructors the same sample and ask each to apply the rubric. Compare the reason for each score. Where the ratings differ, ask which detail each person used and agree what the criterion should capture. A sample near the threshold is more useful than a perfect demonstration because it exposes differences in interpretation. Use that calibration when several people teach the same curriculum or when a relief instructor covers a session. The agreed examples also help learners understand what is expected.
Give feedback the learner can test immediately
Describe the observation, name its effect on the design or workflow, and identify one next attempt. For example, explain that a heavy passage closed the planned gap, then choose a shorter exercise with enough room to compare two approaches. If a learner struggles with placement, return to the relevant model and ask them to show their viewing angle. A short actionable comment supports a stronger second attempt than a general request to improve control.
| Criterion | Evidence | Meets the objective when | Repeat or pause when |
|---|---|---|---|
| Placement | Drawing and placed reference | Key landmarks align at intended scale | Landmark relationships are lost |
| Mark control | Completed line or coverage shape | Defined boundary and target gap remain readable | Repeated overrun or unclear edge |
| Equipment choice | Learner's explanation and setup | Footprint matches the intended mark | Tool crowds the area or role is unclear |
| Station workflow | Observed setup and interruption | Clean and used items follow the assigned routes | A contamination concern requires action |
| Professional communication | Observed discussion and handoff | Learner explains the task and responds to instructions | Client or supervisor needs essential information |
Buy equipment and supplies by station
Buy for the number of people operating at once
Count simultaneous learners, demonstrators, and reserve needs separately. A demonstration pen gives the instructor a working position while learners continue with their own equipment. Spare power supports a compatible handpiece during a change. For a full setup, the dual-battery Biomaser U1 is an option for the academy's compatible universal PMU route. Pair it with the liner, shader, and exercise surfaces assigned to the course. Ask for a volume quote if multiple new stations need the same equipment.
Offer a consumables-only enrollment path
A learner who owns a compatible working pen may need only the exact course supplies. Publish the required interface and roles in the joining instructions. Ask the learner to confirm their charging arrangement and any model-specific requirements before the course. Use the same surfaces and grouping roles for comparison across the class. If a different pen affects the assignment, clarify whether the school accepts it or can arrange an approved loaner. This gives students a practical route without duplicating sound equipment.
Distinguish shared tools from individual supplies
Some items serve the whole cohort, while the exercise stock needs to be allocated by learner or attempt. Treat practice sheets, individually packaged cartridges, and other required consumables according to the course and hygiene workflow. Identify what each learner receives, what the academy supplies at the bench, and what can be reordered after class. An assistant should be able to replenish an item without opening a second student's pack. Decide that packaging before sending the class order.
Confirm the kit against the lesson at one station first
Set up one complete station with the proposed order. Run the outline exercise and the coverage exercise. Then simulate a missing supply and a battery change. This trial shows whether the order covers the lesson and whether the teacher can ask students to use the same setup. If a model or grouping is rarely used, move it out of the starter pack and buy it for the appropriate module. Use the ATTO academy kit and instructor demo request to discuss the full setup and class quantities.
| Purchase route | Core equipment | What to add | Best use |
|---|---|---|---|
| New PMU station | Compatible dual-power pen | Fine liner, compact shader, flat sheet and required model | Student lacks a complete setup |
| Existing pen route | Learner's approved machine and power | Course-specific cartridges and surfaces | Equipment already meets the lesson |
| Tattoo practice route | U9 Tattoo Practice Kit | Separate stencil and transfer materials | First synthetic outline-to-fill exercise |
| Shaped model module | Course-approved pen | Anatomical model and matching working groups | Learner has completed the flat baseline |
| Instructor demonstration | Dedicated compatible pen and power | Same practice materials used by the cohort | Instructor and learners operate together |
Run a cohort and improve the next one
Use a pilot cohort to settle the supply quantities
Run the first class with a defined exercise count and one reserve supply plan. Note which exercises learners repeat and which consumables the instructor uses in demonstrations. Then compare the real pattern with the order quantities. If a long first attempt uses most of the practice area, provide room for the second attempt at the next class. If students rarely use a shaped model from a shared starter pack, assign it only to the module that needs it. The academy can use the same machine and surface standards without shipping the same basket to every learner.
Before expanding the next cohort, check the room schedule and instructor coverage as well as the supplies. A second set of consumables cannot relieve a shared demonstration pen when two groups need it at the same moment. A dedicated teacher station can remove that conflict. A different start time can also keep two activities from competing for the same bench. Review the bottleneck before requesting the next equipment quote.
Schedule setup, practice, feedback, and turnover
Give the instructor time to demonstrate, observe, and respond to a second attempt. Include time for safe turnover and restocking. A packed timetable can turn a practical assessment into an exercise in waiting for a tool or instructor. Track which stage uses the most bench time. If learners spend the first hour adapting unfamiliar charging or cartridge systems, improve the joining instructions or standardize the loaner station. If a shaped exercise needs more feedback, adjust the cohort schedule before buying more equipment.
Retain examples that help the next assessor
Include a view that shows the whole assignment as well as a view of the important detail when both are needed. A small lip contour may look accurate in isolation while its relationship to the adjacent coverage becomes clear only in the wider image. Ask the assessor to identify the observable difference before relying on the example. Keep enough context to show what the learner was asked to do and what conditions applied to the exercise. This lets a later instructor compare like with like and choose feedback that still fits the assignment.
Save appropriate examples of exercise outcomes under the academy's procedures. Use them to show common placement errors, a clear boundary, or a useful second attempt. Handle any real client information and images under the applicable consent and privacy requirements. Training examples should be easy to connect to the criterion they illustrate. A close image of a mark can show tool control, while a wider image of a shaped model can show placement and visibility. Choose the view that makes the feedback clear.
Review procurement against actual use
After a cohort, compare what students used with what the academy purchased. Identify the items that needed replenishment and those that stayed unopened. Look at why. A shaped lip model unused in a brow-only class says little about its value in a lip course. A shared power setup that repeatedly interrupted class may need a dedicated purchase. Use actual course consumption to update the next order and send students a refill list based on the work they completed.
Give graduates a practical continuation route
Explain which exercise the graduate can repeat independently on the appropriate synthetic materials and which work requires further supervision or authorization. Provide a product list matched to their setup. Include the selected cartridge roles and the appropriate surface. If a graduate is moving to another jurisdiction or studio, show how to check the applicable requirements before offering a service. A clear route after class makes the equipment useful and gives the learner a way to build on the instructor's feedback.
Frequently asked questions
Should every class start on a flat sheet?
A flat sheet is useful when you want to isolate the mark and compare attempts under similar conditions. An advanced course can verify the baseline briefly before moving to the shaped task. Choose the starting stage from the learners' demonstrated skills and the course objective.
How many models should a beginning class buy?
Buy the shapes that introduce the specific placement or access constraint in the curriculum. A lip course needs a different model from a flat tattoo stencil-to-fill exercise. Count the number of simultaneous learners and any separate demonstration surfaces.
Does a good result on silicone establish live readiness?
It establishes a result under the conditions of that exercise. Add the relevant shaped assessment, simulated station workflow, supervision, and applicable authorization before moving to a live setting.
Do learners need the instructor's exact machine?
Use the academy's requirements for compatibility and the assigned assessment. A learner's existing pen can be appropriate if it supports the specified cartridges, power setup, and task. Standardize equipment where the lesson itself depends on a common working response.
Should an academy include spare batteries in student kits?
A dual-power setup is useful when the class needs a ready change and the student lacks compatible spare power. Match the configuration to the machine. A separate demonstration or simultaneous learner position requires another working handpiece.
What is the best way to assess a trainee who works slowly?
Observe where the time goes. If they are preserving visibility and following the procedure, give focused feedback on the part that takes the most time. If they repeatedly stop to find a supply, adjust staging and reassess the relevant task.
Can a visiting instructor supervise live work?
Confirm the instructor's and learners' roles, authorization, premises, dates, and any applicable temporary or guest requirements with the relevant authority. Build the course around the answer for that venue and service.
Which materials should be kept separate?
Keep synthetic exercise ink and supplies identified for practice. Prepare client-service stock under the applicable rules and studio procedures. Within the class, separate clean stock, active materials, and used items by how they move.
How can two instructors score consistently?
Use the same rubric and review shared examples, including one near the threshold. Ask each instructor to explain the visible reason for their score. Agree on the observation and the next action before assessing students independently.
Equipment covered in this guide
-
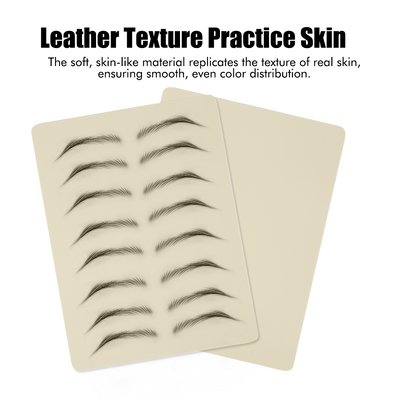 Atto A4 High-grade Hairstroke Silicone Practice Skin
1 Piece
$0.90 USD
View product
-
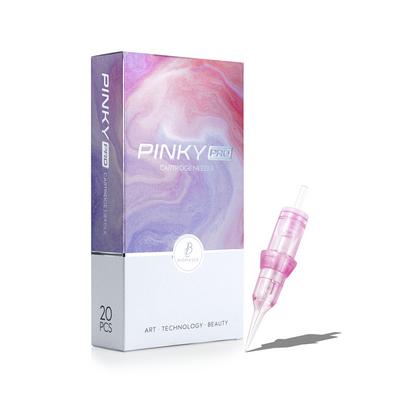 Pinky Pro 1R Single Round Liner PMU Cartridges
0601RL (1R-0.20mm) / Pinky Pro 20pcs
$14.49 USD
View product
-
 Pinky Pro RS Round Shader PMU Cartridges
1003RS (3RS-0.30mm) / Pinky Pro 20pcs
$13.99 USD
View product
-
 U9 Tattoo Practice Machine Kit
$169.00 USD
View product

