

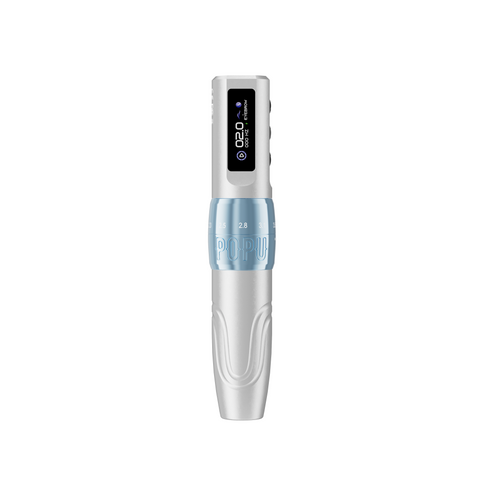
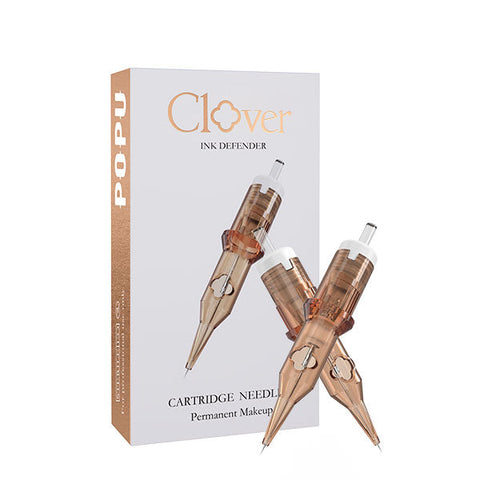


Choose the P3 Pro Black Matte Pen + Extra Power for a wireless tattoo station that needs both fine grouped lines and broader coverage in the same working day. Its six stroke positions are 2.0, 2.4, 2.8, 3.3, 3.7 and 4.2 mm. The matching second power module lets you fit a charged spare when the first needs charging. Start with Thunder Pro 0803RL, 10 cartridges for compact contours and Thunder Pro 1007RM, 10 cartridges when the work calls for a curved shaded field.
Choose a proven wired bench when the artist stays at a fixed station and its supported connection and cable route already fit the work. Studios can schedule wireless and RCA-equipped machines together as separate, verified setups. Check the exact machine for a supported RCA route before buying a cable or power supply. The wireless P3 Pro purchase in this guide is based on its documented battery configuration.
On this page
- Follow the motion inside a rotary pen
- Read stroke travel without confusing it with depth
- Separate torque give and working feel
- Interpret voltage and speed in context
- Use the six P3 Pro positions
- Choose wireless or an RCA bench
- Evaluate one change at the station
- Buy around the actual studio schedule
- Rotary pen engineering FAQ
Follow the motion inside a rotary pen
Rotation becomes repeated linear motion
A rotary motor turns. A drive mechanism converts that rotation into the reciprocating movement used at the cartridge. In a simple eccentric mechanism, an offset point goes around the motor axis and makes a connected slider travel between two ends. A larger effective offset can increase the travel in that type of design. The actual mechanism determines the relationship between the setting and movement. Use the published stroke values for the exact machine when comparing a purchase.
The drive and cartridge form one mechanical system
The motor drives the mechanism, which moves the cartridge assembly. The cartridge guides the working points and can add load through its moving parts and flexible elements. Fit matters because an incorrectly seated cartridge changes the connection between the two assemblies. Check that the exact cartridge interface is supported, then set up the combination according to its directions. If motion feels irregular, a fresh compatible cartridge can help distinguish an isolated unit from a problem that repeats at the machine.
Identify the working load behind a change in feel
Changing from a compact round liner to a curved magnum changes the grouping, working width and how the points approach the surface. A change in sound or feel may also reflect how the assembly responds under that load. Begin with a controlled comparison using the same compatible setup, then change one element. This gives you a meaningful reason to keep a machine or buy a different grouping.
| Part or quantity | Mechanical role | Studio observation | Useful comparison |
|---|---|---|---|
| Motor | Supplies rotational motion | Response as the working load changes | Same machine and compatible group |
| Drive mechanism | Turns rotation into travel | Different mechanical travel across stroke settings | Same cartridge at two supported positions |
| Grip and interface | Seat the cartridge | Secure documented fit | Approved machine and cartridge pairing |
| Cartridge geometry | Determines the contact arrangement | Narrow line or wider field | Same design scale with the intended grouping |
| Power system | Supplies electrical energy | Continuity of the working session | Prepared matching modules or documented wired setup |
Think in cycles when comparing the same travel
The slider repeats a cycle from one endpoint to the other and back. Stroke gives the distance between the endpoints, while cycle rate describes how often the motion repeats. A mechanism can have a similar cycle rate at two stroke positions and still move through different distances within each cycle. Instantaneous speed can also vary along the path. For a simple eccentric, the slider slows near the ends and moves faster through the middle. This is a conceptual picture. Use the exact machine specifications for the configuration you are buying. At the bench, a controlled comparison of the actual mark tells you which response the artist prefers.
Read stroke travel without confusing it with depth
Stroke is the distance between two mechanical positions
A stated 2.0 mm or 4.2 mm stroke describes the machine's travel between endpoints. It helps compare mechanical configurations. It does not specify how far the points project from the cartridge or how a mark sits in tissue. Machine travel, the assembled setup and the artist's technique are different quantities. Compare them separately and use synthetic rehearsal to establish the handling of a new combination.
Compare the same short path at two positions
Choose a straight segment and a bend. Use the same approved cartridge and suitable synthetic material. Begin with a familiar supported position and repeat the same mark with one neighboring position. Compare the start, curve and taper rather than trying to rank settings by feel alone. If both are suitable for the narrow mark, keep the one that gives the artist more consistent handling. If the mark changes because the cartridge also changed, repeat with the original group before assigning the difference to travel.
A longer travel changes the movement available to the assembly
The greater distance can be useful when the artist wants a more deliberate response for a different mark. The effect belongs to the complete combination. A wider grouping and longer travel are separate variables. For example, compare the intended field using one group at two supported positions before you move up in group size. If the issue is that a field needs more width, a suitable wider group can address that more directly than a travel change.
Use the layout to decide where a setting matters
Divide a practice design into a narrow contour, a small tonal transition and a larger filled area. Decide which element deserves a different mechanical response before you touch the adjustment ring. Begin with the line and use the shading group for the tonal area. A change in stroke may help the second task. The outline should remain a separate reference so the result tells you which decision helped the actual design.
Test long and short travel without moving the drawing
On a synthetic layout, put two copies of a narrow arc beside two copies of a compact shaded field. Use the same scale and orientation. Choose the intended group for the arc and keep it in place while comparing two supported positions. Repeat the approach with the intended shading group on the field. Look for a repeatable change on two samples. A mechanical setting that feels different can still make two marks look similar. Use that result to keep a familiar configuration for the work instead of changing travel simply because another position is available.
Separate torque give and working feel
Torque describes rotational turning effort
Torque measures turning effort at the motor or drive shaft. It does not by itself describe how a pen will feel with every cartridge. The drive ratio and geometry, the way the motor is controlled, and the load all contribute to the response. A motor can behave differently at different speeds and loads. If two product listings use different methods or provide no comparable measurement, compare the same real working task with approved equipment.
Give describes how the system yields under load
Artists use give to describe how much the assembly seems to yield as it encounters resistance. A deliberately compliant mechanism can behave differently from a more rigid one. Cartridge components and machine settings can influence the perception as well. Give and torque are distinct. A machine may supply useful turning effort while its assembly still has some compliance. Compare one short curve or shaded field with the same grouping before assigning a difference to one component.
Separate a steady response from a heavy first impression
A stronger-feeling start does not tell you how the machine will carry the rest of a pass. Examine the beginning, middle and end of the same short working section. If the first mark is heavier and the next is clear, inspect how the tip was loaded. If the response changes through the whole section, check the compatible cartridge, the assembled setup and the documented operating range before changing the machine.
| Attribute | What it describes | What may change the perceived result | Useful studio comparison |
|---|---|---|---|
| Torque | Turning effort | Speed, control and load | Same approved setup on a representative mark |
| Give | Yield or compliance under load | Drive, cartridge and technique | Same group and path with one setup change |
| Stroke | Mechanical travel between endpoints | Drive geometry and selected position | Same group on two adjacent supported positions |
| Needle projection | Visible extension relative to tip | Assembled adjustment and cartridge | Verify according to equipment instructions |
| Working mark | Actual line or field | Grouping, setup, liquid, movement and surface | Inspect a controlled synthetic sample |
Use force and motion as separate observations
At a given rotational speed, torque relates to the turning effort available at the shaft. Mechanical power combines turning effort with rotational speed. Two machines can therefore deliver a different working response even if a speed figure looks similar. The drive then translates shaft motion into movement at the cartridge. In practice, this means a purchase comparison needs the compatible assembly and a real working task. Compare the same compact field or contour with the intended cartridge before deciding that one motor characteristic is responsible for the result.
Interpret voltage and speed in context
A voltage setting is a system input
An electrical setting belongs to a particular machine and controller. It is not a universal measure of working speed. Load, power delivery and the way the controller drives the motor can affect the response. Start within the product's documented operating directions and compare a representative synthetic mark. A setting familiar on one pen may not reproduce the same motion on another, even with a similar grouping.
Watch for changes under a comparable load
A pen moving without a working cartridge is a different condition from a machine carrying an approved group. Compare the setup under the normal intended load on a suitable synthetic surface. If the behavior varies, inspect the seating and repeat with a fresh approved cartridge before concluding that the motor is responsible. For a comparison of two machines, choose a configuration that both accept and assess the same line or field.
Keep power state and output behavior separate
A charged module is an available supply of energy for the documented device. Capacity is not a measured appointment length. The actual schedule, machine behavior, cartridge load and charging process all matter. For a busy station, keep a charged matching spare ready rather than inferring the length of a session from a capacity number. Where a bench uses a supported external supply, confirm its connection and directions before the work begins.
Work from the stable baseline when a response changes
If the working sound changes after you fit a different group, return to a previously checked setup on a synthetic sample. Confirm that it still makes the familiar mark. Then assemble the new group according to directions and compare the same working area. If the change returns only with the new group, inspect its fit and the way it contacts the surface. If the baseline has changed too, check power, seating and machine condition before comparing technical settings. A familiar reference makes the next decision smaller and easier to verify.
Use the six P3 Pro positions
Compare the short end around small controlled details
The 2.0 and 2.4 mm positions let you compare the shorter end of the documented range. Start with the same compact group and a short synthetic outline. Keep the line's turn and final taper visible. If one position makes the mark easier to repeat, carry it into a second part of the same layout before adopting it for the task. Shorter mechanical travel gives you a comparison point. The particular line also depends on grouping, angle and the complete setup.
Use the middle range for a deliberate transition
The 2.8 and 3.3 mm positions sit in the middle of the range. Try one for a compact tonal passage using the intended curved magnum. Compare an open edge and the denser centre. If one sample looks too defined at the edge, check the path and how the group approached the surface before changing the machine again. The best comparison reproduces the same intended transition with one change.
Compare the longer positions for the mark that needs them
Use 3.7 and 4.2 mm to compare the longer available travel in a controlled synthetic study. Choose a field or contour that genuinely benefits from evaluating a different mechanical response. The wider mark still requires a suitable grouping. Compare a small sample before carrying the chosen setting into the entire practice design. This lets the artist judge whether the extra travel serves the mark.
| P3 Pro setting | Where it sits | Synthetic test | Decision to make |
|---|---|---|---|
| 2.0 mm | Shortest | Narrow line with a visible start and taper | Does this shorter response fit the fine mark? |
| 2.4 mm | Short | Same line and bend | Is the curve easier to repeat with the same group? |
| 2.8 mm | Lower middle | Compact tonal passage | Can you keep a visible transition into open space? |
| 3.3 mm | Upper middle | Same passage and edge | Does the longer middle option help the mark? |
| 3.7 mm | Long | Deliberate contour or small fill sample | Does a longer response suit this grouping and area? |
| 4.2 mm | Longest | Same representative mark at the upper setting | Does the maximum documented travel serve this work? |
Check the setting before changing grouping
Use the adjustment ring and display as directed by the product. Make one representative mark before you change anything else. If a passage is too narrow with a compact group, compare an appropriate wider grouping as a separate step. If the issue is the way the line starts and finishes, hold the group and compare an adjacent travel setting. This separates the size of the working footprint from the feel of the moving assembly.
Choose wireless or an RCA bench
Wireless makes movement around the chair easier
A wireless body gives the artist room to change position without moving a working power cable. This matters when the design calls for access from both sides or the artist moves between prepared positions. The P3 Pro Black Matte Pen + Extra Power includes a second matching module. Prepare both according to the directions. Start with the working module and keep the spare ready so a power change can fit into the studio's established reset.
Keep a wired bench when it serves the assignment
An RCA-powered route uses an appropriately supported machine connection, cord and supply. A fixed chair can make that route efficient when the cable is arranged around the normal work position. Check that the cord reaches the intended points without interfering with how the artist approaches the piece. Confirm the equipment instructions for the exact machine and its power route. A listing for a wireless package establishes the configuration included with that package.
Schedule the two routes around the work
Consider one artist assigned to a fixed chair for a series of small motifs while another works around a larger composition. The fixed position may suit a proven RCA bench. The larger piece may benefit from a wireless setup with a charged spare. If the schedules overlap, equip each station with its own complete working body and approved power. If the same artist moves sequentially between assignments, plan where the next compatible cartridge and power supply will be ready.
| Studio situation | Wireless setup | Documented RCA setup | Practical first choice |
|---|---|---|---|
| Regular movement around the chair | No working power cord at the pen | Route cable for each position | Wireless with a charged matching spare |
| Fixed chair and familiar equipment | Prepare and check battery modules | Keep verified supply and cord in place | Existing supported wired station |
| Back-to-back wireless sessions | Swap to charged spare as needed | Relevant if the machine supports it | Pen + Extra Power for a new P3 Pro setup |
| Parallel appointments | Independent bodies and power for each artist | Independent complete stations | Buy for concurrency, then choose power by station |
| One pen needs a matching spare | Add the documented module | Confirm exact machine option | Purchase the part that fits the working body |
Separate spare power from spare equipment
An extra module can restore energy to a working body. A second pen covers a separate assignment or serves as a backup if the body itself is unavailable. If you already own a compatible P3 Pro with one module, choose the Black P3 Pro replacement power module for that documented product. If a second body has a defined job and power is already available, the P3 Pro Black Matte Pen is the direct machine package.
Rehearse a power swap at a natural transition
A studio can plan the swap before the booking. Identify a suitable transition in the normal working process, prepare the matching spare and follow the manufacturer's directions for handling and charging. For a fixed RCA station, walk through the same reset and check the cord and supply in their usual positions. Compare which setup interrupts the real workflow. A battery is valuable when a charged spare is available at the point of need. A fixed supply is useful when it keeps the chair ready through consecutive appointments with clear access.
Evaluate one change at the station
Choose a short test that matches the next task
Prepare a narrow straight line, a turn and a compact tonal field on suitable synthetic material. Use the approved liquid and cartridge. Check the same beginning and ending points on each copy. If the work is mostly lettering, include a small counter and a difficult transition. For shading, include an open edge so you can see whether the final part stays soft. A relevant test gives the artist a useful result before the whole design is repeated.
Confirm compatibility and the mechanical setup
Read the machine and cartridge instructions, then confirm the connection and seating. The P3 Pro uses the standard universal connection documented for these choices. If motion feels irregular, pause and check the setup before increasing the setting or changing groups. Try a fresh compatible unit where appropriate. A symptom that follows one unit is different from behavior that repeats across several correctly fitted cartridges.
Inspect the mark before explaining it
Compare the start, centre and end. Does the line break only around the bend? Does the shade field cover enough width but lose its soft edge? Describe the observation before choosing the cause. One more short sample with the same group and a neighboring supported position may clarify the working response. A different grouping may clarify a footprint question. Keep those tests separate so you know what improved.
Try the second setup at the same appointment position
Arrange the chair and working area the way they will be used. Check the position from which the artist actually approaches the design. If a cable makes one end hard to reach, rehearse the same move with the wireless body. If a wireless station repeatedly needs a charged module before the next booking, prepare spare power and compare the normal reset. Use the established hygiene and setup process for both.
| Observation | Hold constant | First comparison | Decision |
|---|---|---|---|
| Fine curve varies | Group, path and suitable surface | Neighboring supported stroke position | Keep the setting that gives a repeatable turn |
| Field is too narrow | Intended area and edge | Appropriate wider compatible group | Change footprint if width is the issue |
| Motion feels rough | Machine and selected setting | Fresh compatible cartridge | Check fit and equipment if repeated |
| Cable obstructs access | Chair and working position | Supported wireless setup | Choose the route that leaves the working position clear |
| Power stops the reset | Working body and appointment plan | Charged matching spare | Equip the wireless station for the schedule |
Put the artist and observer in the same viewing position
During a practice comparison, have the observer look from the same direction as the artist before judging a narrow mark. A dark outline can look even from above but lose its taper from the normal approach. A field can appear larger because the paper or synthetic sheet has been rotated. Keep orientation steady, then move closer to inspect the working edge. The clearest comparison ties the machine change to a visible result that both people can locate and repeat.
Buy around the actual studio schedule
Build the first order around complete work
Start with Black Matte Pen + Extra Power and the 0803RL liner. Add the 1007RM when the work includes softened edges or compact fields. Its seven 0.30 mm pins and curved working profile serve a different role from the compact three-pin 0.25 mm round liner. Select both ten-cartridge boxes when both marks occur regularly. A larger reorder makes sense once the studio knows which grouping is used and how often.
Choose the body alone when compatible power is already prepared
The Pen package serves an artist who already has compatible power available for the intended station or plans to charge between assignments. If one module is the only power source and appointments run consecutively, order the documented spare. The second charged module has a clear job between sessions. If the studio is short a body during concurrent appointments, place a separate order for the working machine and all the supplies that station needs.
Teach the transition from outline to field
Have an instructor demonstrate a compact outline and then a soft field on the same practice design. Start with the group chosen for the line and use the curved magnum for the field. Explain the shape and width change first. Rehearse one neighboring travel position with the same group if the lesson also covers stroke. This lets the learner observe the contribution of each choice before comparing an entire machine or power route.
Assign the gear before the busy part of the day
Look at the session order and identify where the artist moves, which work needs a shaded field and when a power swap can happen. Put the matching groupings and charged power into the approved preparation process. Give a second artist independent working equipment if appointments overlap. A complete purchase earns its place by enabling the work the studio already plans to do.
Rotary pen engineering FAQ
Does a 4.2 mm stroke describe penetration?
It describes mechanical travel between endpoints. Projection and the actual working mark depend on the assembled setup and technique. Use the documented equipment directions and appropriate training.
Is a higher voltage always faster?
Compare the actual supported machine under a representative load. The electrical setting interacts with its controller, drive and cartridge. Use the working response and a controlled mark as the comparison.
Are give and torque the same thing?
Torque describes turning effort. Give describes how much the assembly yields under load. A working comparison can show how the full system feels with the same cartridge and mark.
Which P3 Pro setting should I try first?
Begin with a familiar supported position for the intended mark and compare one neighboring position on suitable synthetic material. Keep the grouping and path fixed during that comparison.
Which cartridges make a useful first pair?
Choose 0803RL for a compact grouped outline and 1007RM for a curved shaded edge. Buy the shade group when the design needs its separate working footprint.
Should I buy Pen or Pen + Extra Power?
Choose Pen + Extra Power for a new station with consecutive bookings. Choose Pen when the intended station already has compatible spare power or a schedule that accommodates charging.
Can I use an RCA cord with any rotary pen?
Use a cord and supply only where the exact machine documents a supported RCA route. The P3 Pro package described here is selected for wireless power.
Can two batteries power two artists?
The two matching modules serve one working pen in this package. Give both artists independent compatible equipment for simultaneous work.
When is a fixed RCA bench the stronger choice?
Keep a supported wired setup when the artist stays at one prepared chair and the cable route works for the design. Choose wireless when movement or a change of position makes that freedom valuable.