


A client can want their lashes to look denser without wanting visible makeup. Another may want the silhouette of a short wing. A third may want a soft shadow that looks more diffused than liquid liner. Those requests need different drawings. They also need the same careful separation between what the client can see, what a design can show, and what a qualified practitioner can assess near the eye. Start with a removable or paper proof, use the client's normal eye position to judge it, and keep a clear route for any ocular concern.
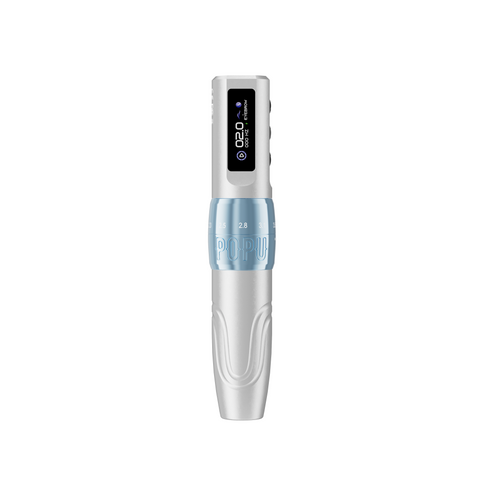
This guide covers design, consultation, product selection, synthetic training and review. It does not provide live eyelid manipulation, entry depth, needle projection, or machine settings for work near the eye. Use the product comparisons for compatible equipment selection and supervised training exercises. Live procedures require qualified practice, local compliance, and appropriate infection controls.
Contents
- Define the three eyeliner briefs
- Screen the client and understand ocular evidence
- Map visible landmarks before choosing a tool
- Design lash enhancement
- Design a classic wing or smoky shadow
- Choose cartridge and pigment roles
- Build a safe training progression
- Review symptoms and healed appearance
- Plan three studio consultations
- Frequently asked questions
Define the three eyeliner briefs
Lash enhancement emphasizes the visible lash base
The client usually wants the lashes to read as a fuller frame. Ask how the client notices the gap they want to address. They may see it in a photograph taken from the front or when looking in a mirror without makeup. Sketch a restrained enhancement proof at actual size. Let the lashes keep their role as the main visible feature. The design conversation concerns appearance near the lashes. It does not define the eligible tissue or establish where a procedure can be performed.
Classic liner emphasizes an identifiable contour
Classic liner typically reads as a defined line. A wing adds an outward directional feature that changes the silhouette of the eye area. Show a version that ends with the visible contour and another with a small outward extension. Use the same main line weight in both so the client can focus on direction. If the outer extension makes the rest of the design look heavier, shorten it in the drawing before adding width elsewhere.
Smoky shadow emphasizes a softer visual edge
A smoky proof can show an edge that transitions into the surrounding area rather than appearing equally sharp across its full width. Draw the darker supporting part first, then place the diffused region in a separate layer. Compare it at normal viewing distance. A wide soft field can still look heavier than a narrow defined line. The client's preference may involve overall coverage as much as edge softness.
| Brief | First visual effect | Proof to show | What to inspect before deciding |
|---|---|---|---|
| Lash enhancement | Fuller appearance of the visible lash base | Sparse and slightly more visible variants | Whether the effect stays subtle in normal gaze |
| Classic line | Defined silhouette | Same contour in two line weights | Whether the line reads through the natural fold |
| Classic wing | Directional outer extension | Same line with and without a short extension | Whether the wing remains coherent in open eye view |
| Smoky shadow | Diffused outer edge | Same shape with two transition widths | Whether the transition gives softness without making the whole field too heavy |
| Previous eyeliner | Change to an existing field or shape | Old boundary overlaid with the target | Whether cosmetic design can address the concern or needs referral |
Screen the client and understand ocular evidence
Ask how the eye feels before discussing the design
Use the studio's approved screening process and ask the client about relevant ocular history, current symptoms, previous eye procedures, existing pigment and changes after earlier work. Dryness, recurring irritation or a recent change may need evaluation beyond a cosmetic consultation. The practitioner should know when to defer and how to refer. Treat an ocular concern as its own question even if the client is chiefly interested in the line shape.
Describe what the research observed
A clinical study compared participants with and without eyelid tattooing and reported differences in meibomian gland findings and tear-film stability. The meibomian glands contribute lipids to the tear film. The study is useful evidence that eyelid tattooing and ocular surface findings deserve attention. It does not establish a risk estimate for every style, validate a particular needle or pigment, or identify a safe distance for a given client. Do not derive a treatment map from a group comparison. Eyelid tattooing and tear film study
Keep ocular anatomy and a makeup sketch separate
The visible lash area, eyelid margin, ocular surface and adjacent skin have different roles. A makeup-style sketch expresses the feature the client wants to see. It cannot determine which tissue can be treated or how to position a live eyelid. A request to draw a line closer to the visible edge does not justify an assumption about a safe target. A qualified practitioner must assess the case and act within the applicable scope, and ocular questions belong to appropriately qualified eye care or medical professionals.
Check infection control and product evidence separately
The FDA provides information on infections and adverse reactions related to tattoo and permanent makeup. An appropriate workstation includes verified product identification, the intended use and market information for the exact materials, and the studio's professional infection-control workflow. A product page identifies an item and can help you compare equipment. It does not establish that a procedure is suitable for a particular eye or that an ingredient can be used in any location a client requests. FDA permanent makeup safety information
Map visible landmarks before choosing a tool
Compare open-eye appearance and natural expression
Look at the eye area in normal gaze under stable light. With consent, compare reference views taken at consistent distance. Note whether the fold hides or reveals the part of the design the client cares about. Check the overall effect while the face is relaxed and during ordinary expression. A design that reads clearly on a flat drawing may disappear behind a fold or look much stronger at one end. Treat those observations as design information.
Map the inner and outer transitions separately
At the inner side, a line that is too prominent in a proof can change the whole impression. At the outer side, a small directional mark may do most of the visible work. Compare those two transitions independently. Show the client a quieter inner proof and an outer proof with the agreed endpoint. Ask which part feels too strong or too weak before increasing the line throughout the design.
Work with asymmetry instead of tracing a mirror
Natural eyelid folds and visible lash patterns can differ across the two sides. Compare the projected design as a pair and assess how each side reaches the visual goal. An identical outline can look unequal when one fold covers more of it. A drawing that uses the same purpose but subtly different shapes may look more balanced. Ask the client which difference they notice at conversational distance. This keeps the consultation anchored in the appearance they want.
Use actual-size proofs to check negative space
Small spaces determine whether a wing appears separate from a fold, whether a soft edge reads as a band, and whether a narrow line remains visually restrained. Reduce the proof to working size and mark the tightest interval. If two drawn edges merge in the proof, simplify or move the element that contributes less. A tool with a smaller footprint can help with a particular mark, but the map still needs enough space for that mark to be visible.
| Visual landmark | Question to ask | Common proof problem | Design comparison |
|---|---|---|---|
| Visible lash base | What gap or light area does the client notice? | Proof reads as heavy makeup | Compare narrower apparent line weight |
| Inner transition | Where should the visible effect fade? | A dark block competes with the eye | Show a quieter entry in the same shape |
| Visible fold | Which part remains visible in normal gaze? | Line looks clean in a flat view only | Review the same proof in the normal open-eye view |
| Outer contour | Where should the main line end? | Weight accumulates at the corner | Compare a shorter endpoint |
| Wing direction | Does the extension agree with the overall shape? | Tip visually breaks at a fold | Change direction or simplify the extension on paper |
| Diffused edge | How much area should appear shaded? | A soft proof looks like a wide band | Reduce the transition area while keeping the shape |
Show how a reference changes with gaze
For an academy exercise, draw the same outer extension on two photographs of a synthetic model taken from different angles. Ask learners to mark where the apparent line direction changes and identify the view that best represents the client's intended result. Then have them revise only the extension. This makes the role of the viewing angle visible before they change the main line, choose a different cartridge, or make the proof darker.
Design lash enhancement
Preserve the lashes as the main visual structure
If the brief calls for fuller-looking lashes, begin by showing the smallest change that gives the desired definition. The native lash pattern may already carry much of the effect. Identify which gap needs attention in the proof and keep the rest quiet. Compare with an example that reads as a deliberately visible line. That side-by-side view helps the client choose between a change that supports the lash base and one that creates a separate makeup effect.
Distinguish black versus brown from width
A client may ask for a softer color when the original example feels too heavy. Compare the same shade direction in a narrower proof and then compare the same line width in two color directions. One difference may matter more. Brown can be discussed as a visual reference when the client wants a different color relationship. A narrower dark line can also look restrained when the drawing preserves space. Choose the actual product only after checking its intended use, market information, and the assessment for the case.
Decide whether a clear endpoint improves the brief
Lash enhancement often succeeds by looking continuous enough to support the lashes without creating a distinct extension. Draw a short endpoint near the visual outer contour and compare it with a longer finish. In the shorter proof, look for a transition that does not draw attention by itself. The client's preference for a longer finish may indicate they want classic liner. Show that as its own design instead of blending two different briefs into one unclear map.
Design a classic wing or smoky shadow
Use the open-eye view to test a wing
Sketch the wing in relation to the visible outer shape. Compare the line in the normal front view and from a slight side angle. If the shape appears to bend suddenly at the fold, draw a shorter or differently angled extension and review it again. A longer wing is one design option. It can also add visual weight outside the area the client wants to emphasize. Settle the overall direction and endpoint before choosing a tool.
Give the wing base and tip separate jobs
A wing needs a connection to the main contour and a visible finish. In the drawing, make the join easy to follow and let the endpoint taper. Examine the base and tip separately at actual size. If the base looks too heavy, reduce its visual weight without moving the endpoint. If the tip disappears, compare a simpler direction. This approach avoids making the whole wing wider to solve a small local problem.
Draw the smoky field in layers
Begin with the overall shape, then put a quieter transition around the portion that should appear diffused. Compare a compact transition and a wider one at the same apparent depth. A wider field may look softer at its outside edge and still look heavier as a whole. Ask whether the client wants a more diffused edge or less overall coverage. Those preferences lead to different revisions. The layers in the proof help isolate them.
Compare a hybrid proof with its simpler alternatives
A client might like a clear inner contour and a softer outer impression. Show the defined line by itself, the soft field by itself, and the combined proof. Keep the overall size stable. Ask which part of the combination contributes the effect they want. If the combined proof looks busier without a visible benefit, keep the simpler design in discussion. Assess any live treatment only after the desired effect is clear and the professional checks are complete.
| Design feature | Compare first | What to preserve | When to simplify |
|---|---|---|---|
| Short classic contour | Two weights in the same shape | Clear line and controlled endpoint | If a thicker proof hides the natural relationship |
| Wing base | Narrow and wider join | Continuity from line to extension | If the join becomes a separate dark area |
| Wing tip | Two directions at the same length | Visible finish in normal gaze | If the fold visually breaks the tip |
| Smoky field | Compact and wider transitions | A coherent gradient near the outline | If the wider field reads as a block |
| Defined line with soft accent | Separate layers and combined view | Distinct purpose for each layer | If either layer already meets the brief by itself |
Choose cartridge and pigment roles
Compare a single point for a fine bench mark
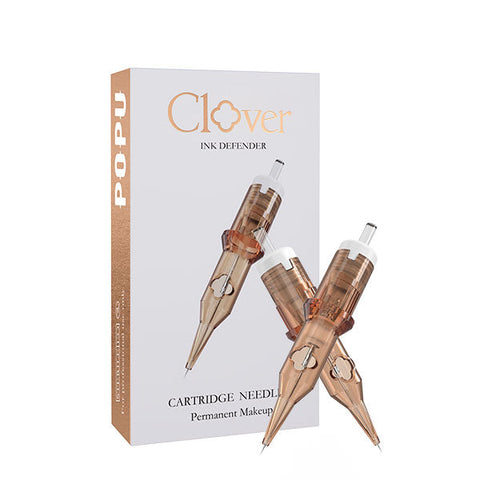
The Pinky Pro 0601RL, 20 cartridges has one 0.20 mm point. On a synthetic exercise, compare it on a short isolated curve with an opening beside it. Judge whether the opening remains visible and the endpoint lands where the design places it. That exercise gives an instructor information about the learner's handling and the cartridge footprint on the model. It does not establish a placement rule near a live eye.
Compare a compact group for a clearer contour exercise
The Pinky Pro 0403RL, 20 cartridges uses three 0.18 mm points. A smaller individual wire can still be part of a broader assembly. Compare it on a defined contour exercise where the sketch has enough room for a grouped mark. An educator can show the two working footprints side by side without implying one is appropriate for every part of an eyelid. Confirm the exact cartridge connection, manufacturer documentation and intended use.
Reserve a coverage exercise for a distinct field
A compact shader can be useful for demonstrating how a small tonal area meets an adjacent line on synthetic material. The Pinky Pro 1003RS, 20 cartridges has three 0.30 mm points in a round shader arrangement. Use this comparison where the practice shape gives the group room. For the first course, choose only the geometries that serve the exercises being taught. The field and contour should have distinct evaluation criteria.
Confirm pigment purpose for the exact product
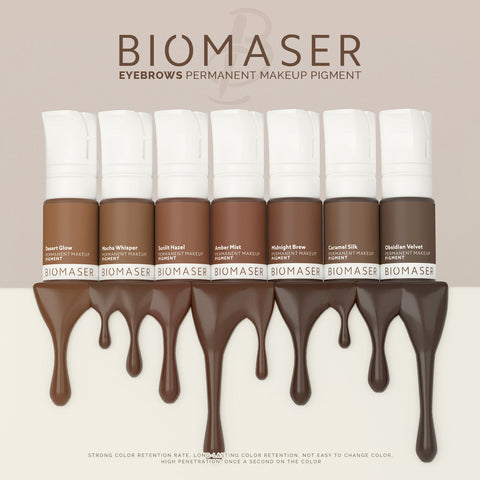
The Blend eyeliner and scalp pigment range is a starting point for checking listed shades and product documentation. Review the exact variant, intended use, market requirements and supplied information before selection. A catalog name does not determine suitability for an individual procedure or site. Use black and brown references to discuss relative visual contrast in proofs. Treat the final material decision as part of the qualified assessment.
| Choice | Verified geometry or role | Bench exercise | Decision before professional use |
|---|---|---|---|
| Pinky Pro 0601RL | One 0.20 mm point | Short isolated curve with visible adjacent space | Confirm exact fit, intended use and procedure assessment |
| Pinky Pro 0403RL | Three 0.18 mm points, compact liner | Defined contour with a visible endpoint | Check whether the footprint serves the approved design |
| Pinky Pro 1003RS | Three 0.30 mm points, round shader | Compact tone and edge comparison | Confirm appropriate use, placement and professional scope |
| Documented eyeliner shade | Exact variant and supplied product information | Compare apparent contrast in the same proof | Verify intended use and applicable product requirements |
Build a safe training progression
Start with drawings and flat synthetic material
Teach learners to identify the actual design goal before they use a powered tool. Ask them to draw the same contour with two line weights and explain which feature changes. On a flat trainer, repeat a short section and inspect continuity and stopping point. The ATTO A4 practice sheet provides a surface for repeated synthetic marks. Select a practice shape representative of the intended exercise and keep enough room to compare it at actual size.
Add a shaped trainer to study visibility
Use a stable shaped synthetic model when a learner can already reproduce the mark on a flat surface. Ask which part of the line becomes hard to see as the surface turns. Let the instructor review tool visibility, support and the continuity of the practice mark. The model helps demonstrate changes in sight line. It does not reproduce the ocular anatomy or response of living tissue. Avoid using a synthetic example to infer a safe angle, depth or pressure.
Assess contours and fields independently
Give the learner a short contour that has a clear beginning and end. In a different exercise, provide a compact tonal area with a boundary they should keep legible. Review each at actual size. A learner may follow a contour well while creating a band in the field. Practice that transition separately before combining the elements. Score the visible result the exercise was designed to teach.
Confirm training scope and infection-control readiness
A synthetic drill, a demonstration and supervised live work are distinct activities. Confirm the academy's scope and the applicable requirements before adding live models. Check how it supervises trainees, manages sterile single-use materials and maintains an escalation route for ocular concerns. Match the consumables to the exercise. Practice supplies should remain identifiable and separate from materials chosen for professional use. Follow the exact product's instructions and the applicable handling and disposal requirements.
| Stage | Material | What to assess | Next step |
|---|---|---|---|
| Design comparison | Actual-size paper or digital proof | Effect, contour and visible space | Agree on the purpose of each mark |
| Flat detail | Synthetic sheet | Continuity and endpoint | Repeat under the same conditions |
| Curved visibility | Stable shaped model | Line of sight and design orientation | Identify which part becomes harder to see |
| Separate tone field | Synthetic model with a defined boundary | Soft transition and readable edge | Combine with the contour after both jobs are understood |
| Live professional progression | Approved setting and qualified supervision | Readiness and individual safety assessment | Follow professional and jurisdictional requirements |
Review symptoms and healed appearance
Treat acute ocular concerns as clinical
Eye pain, a change in vision or an injury concern requires prompt medical assessment. Follow emergency procedures where appropriate. A studio should have a route for telling the client how to obtain qualified care without asking them to wait for a cosmetic review. Give the clinician the procedure timing and exact product information when available and authorized. A photo can support documentation. It cannot safely resolve the clinical question.
Compare stable appearance with the approved proof
When appropriate, use consented views in similar light and normal gaze. First review the whole eye area from the intended distance. Then inspect the feature the client cared about, such as the endpoint or the apparent softness. Changes in contrast, line width and edge appearance can be separated in discussion. Do not judge the eventual design only from the fresh appearance. Follow the qualified practitioner's plan and refer concerns about the eye or tissue.
Keep shape, hue and symptoms in different notes
A line that appears cooler than expected and a client report of irritation require separate responses. Record what the client sees and when it changed. Identify whether the color concern is about a local edge or the whole line. If symptoms are present, follow the studio's referral route before proposing another design or product. A later cosmetic assessment can address color once the appropriate health question has been evaluated.
Plan three studio consultations
Case one: fuller-looking lashes without visible liner
A client likes the density they see with mascara and asks for a similar effect without a clear line. Use a proof that supports the visible lash base and another that reads more like conventional eyeliner. Review both with the eyes in normal gaze. If the client prefers the quieter proof, the discussion can focus on the visible interval they want changed. Assess suitability separately, and use the fine-point comparison on a model for educator feedback rather than as a rule for the live procedure.
Case two: a short wing that disappears in a fold
A client brings a photo of a long, straight wing. In the approved viewing posture, the fold changes the visible direction of the proposed extension. Draw a shorter and a differently angled proof at the same weight. Ask which one still feels like the requested style. Examine the endpoint in the whole view rather than assuming more width will solve the problem. If none of the proofs reads as intended, preserve the agreed main contour and discuss the limits of the extension.
Case three: a smoky look with existing pigment
A client wants a soft field above a previous line. Map the old color and edge first. The existing area may already give the proof more weight than the client wants. Show a separate comparison of a smaller soft field and the current appearance. If previous pigment extends outside the desired design, discuss appropriate assessment before considering another layer. This makes the old field visible as a condition of the design, rather than letting it disappear from the consultation.
Decide what evidence closes the visit
For a design-only appointment, the result may be an approved proof or a clear reason to defer. For a training session, it may be an exercise the learner can repeat at actual size. For a health question, it may be the appropriate referral and product documentation. Keep these outcomes distinct. This prevents an attractive proof, an equipment purchase, or a good synthetic mark from being interpreted as clearance for a live procedure.
Frequently asked questions
How does lash enhancement differ from classic liner?
Lash enhancement aims to make the visible lash base read more fully. Classic liner adds a defined contour that can read as makeup. Compare actual-size proofs in normal gaze to see which effect matches the client's goal.
What makes a wing look balanced?
Compare its connection to the main contour and the endpoint under natural expression. A shorter wing or altered direction can fit the fold better. Review the two sides as a pair while preserving each side's individual landmarks.
Is a smoky design always less visible than a classic line?
A diffused edge can look soft, but a wide field can still have greater visual presence. Compare the designs at the same apparent depth and check which one the client notices first from normal distance.
What did the tear-film study establish?
It reported differences in ocular findings between its comparison groups. That is a reason to take eye symptoms and screening seriously. It does not give a procedure map, a safe depth, or a risk estimate for each style. Clinical comparison
Should I buy 0601RL or 0403RL first for the training bench?
Choose the verified compatible model that serves the first exercise. A single point suits an isolated mark. The small grouped liner is useful for a more defined contour exercise. Keep both when the course has a distinct purpose for each.
What can a shaped trainer teach?
It lets an instructor see how the line of sight and contour change as the synthetic surface turns. Use it after basic marks are repeatable on a flat sheet. It cannot establish live eyelid positioning or tissue response.
Can I choose pigment based on black versus brown alone?
Use that comparison to discuss visual contrast. Then confirm the exact product, intended use and local requirements within the qualified assessment. The shade name is one part of the decision.
What if the client reports new pain or a change in vision?
Use the studio's urgent escalation procedure and direct the client to prompt qualified medical assessment. Provide the procedure timing and relevant product information where appropriate. A cosmetic follow-up can wait until the health concern is addressed.
Can an old line be covered with a wider smoky field?
Map the existing boundary against the desired result. More coverage can make the whole field heavier or leave an old edge visible outside it. Ask for qualified assessment if the prior shape, depth or history prevents the intended change.