


Plan a shading drill by giving the drawing three distinct areas: a compact fill, a broader colour shape and a gradient. Round shader (RS), straight magnum (M1) and curved magnum (RM) cartridges each have a useful role in those areas. Keep the outline, scale and practice surface familiar, then compare one defined choice at a time so the result tells you what to use in the next study.

Choose a drawing with places to compare
A familiar leaf, petal or decorative shape can supply three areas without turning the exercise into a complete large piece. Mark one small enclosed area for a compact fill, a larger bounded area for broad packing and a separate area where the colour is intended to change gradually. Keep each area readable enough to inspect afterward.
Prepare the drawing at its intended size before transferring it to the synthetic surface. Leave a second copy beside the first when the available space allows a direct comparison. A repeated outline gives the next attempt the same visual brief; it also makes it easier to see whether a change belongs to the cartridge, colour or drawing.
Blank 3 mm practice skins give these studies a familiar flat surface. The colour-and-gradient purchasing example uses ten sheets, but the exercise may occupy only part of one. Arrange the study around the usable area instead of treating one session as one entire sheet by definition.
Start with the footprint the area needs
RS for a compact colour area
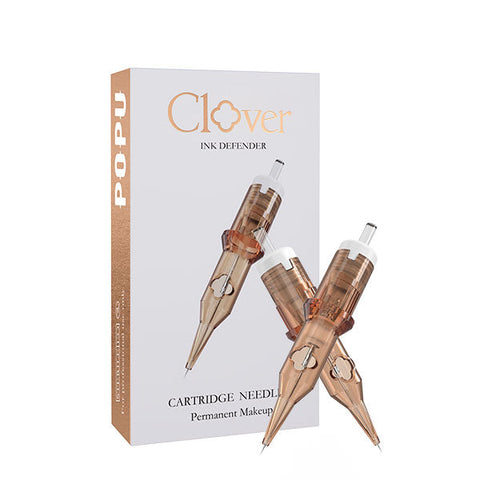
Thunder Pro 1003RS uses three points of 0.30 mm wire in a round-shader arrangement. Its round footprint gives a smaller colour area a purposeful starting configuration. Use the marked compact area to inspect how the fill sits against the drawn boundary and whether its appearance stays coherent across the shape.
M1 for the broader bounded shape
1005M1 supplies a five-point straight-magnum configuration at 0.30 mm. Assign it to the broader area where a magnum footprint serves the coverage. Compare the inside of the filled shape and its edges separately: a large area can look consistent at a distance while small uneven sections remain visible when inspected closely.
RM for the transition study
1007RM supplies seven points at 0.30 mm with a curved working edge. Give it the area planned for a gradient and look at the direction and continuity of the transition. The curved edge makes RM a relevant configuration to explore for soft-edge gradients.
These three examples serve different jobs and use different point counts. Their results are not a controlled proof that one family is universally better. For a focused comparison of wire diameter or grouping, choose configurations that hold the other relevant features steady. The tattoo cartridge code guide explains how the complete Style names those variables.
Compare RS and M1 for the area you want to fill.
Give black, white and red their own visual jobs
Begin with black for a dark-shape study. Put its name beside the area and inspect the visible boundary and fill after the exercise. Use white for a separate light-colour or accent-placement study, and red for a distinct coloured focal area such as a petal. Separating those roles lets you compare placement and visual hierarchy without immediately turning the exercise into a mixing formula.
The True Black practice ink, Snow White Opaque and Bright Red are supplied in 30 ml bottles. These inks are for synthetic practice skin and models only. Their appearance on that training surface is the subject of the study; it does not establish a healed result or suitability for human skin.
Use a separate cup for each working colour. Keep the bottle names and the cartridge configuration in the record so a later review can identify what changed. Add another hue when the drawing gives it a distinct role, rather than enlarging the palette before the first colour study has a clear purpose.
Change one practical choice in the second attempt
Look at the first result before deciding what to alter. If the question is the cartridge footprint, retain the same outline, colour and surface. If the question is the placement of a light accent, keep the cartridge configuration familiar and redraw the intended accent area consistently. State the question in the record before beginning the second attempt.
Record the machine, stroke setting where adjustable, full cartridge Style, working voltage, ink colour and practice surface. These describe the comparison; they are not a universal prescription for every machine or artist. Use your established training setup and the relevant equipment instructions. This guide does not invent fixed operating numbers to make the exercise look more precise.
After the second attempt, inspect the same features as before: the boundary of the compact fill, consistency inside the broader shape and continuity through the gradient. Keeping the review criteria stable makes the two attempts more informative than deciding whether the second one simply looks nicer.
Turn the review into a precise supply choice
If the next study concentrates on small enclosed areas, replenish the RS configuration that served that work. If broad fills occupy most of the practice plan, review the relevant magnum stock. A twenty-pack suits an established configuration; a ten-pack can introduce a size used less often. The useful purchase follows the next study and unopened stock.
Keep paper and gel at a scale appropriate to the drawing queue. Our colour-and-gradient assortment pairs twenty A4 thermal sheets and a 30 ml transfer-gel bottle with the practice surfaces, three cartridge arrangements, named inks and 100 cups. The components close the route from outline to colour study without adding another machine.
Open the colour-and-gradient assortment on the True Black page to select the items needed for your next exercise. Current prices and the applicable offer are shown with the products, while checkout confirms discount and shipping. Keep supplies that are already stocked out of the refill order and invest the basket in the next question you want the practice to answer.
Shading-practice questions
Which cartridge should I begin with?
Start with the area you want to study: RS for a compact round footprint, M1 for broader packing or RM for a curved-edge gradient study. Choose the full grouping and diameter within that family.
Does comparing these three Styles isolate needle arrangement?
No. 1003RS, 1005M1 and 1007RM have different point counts as well as arrangements. They illustrate task choices. A controlled size comparison should hold other relevant features steady.
Do I need three colours for every exercise?
No. A black-only fill study can answer a useful question. Add white or red when a light accent or a coloured focal area becomes part of the planned drawing.
Can these practice inks be used on a client?
The current Thunderlordpower practice inks are supplied for synthetic practice skin and models only, not human skin.