


A natural-looking machine brow begins with the direction of the client's existing hair. At the front, a few distinct strokes can suggest openness. In the body, the flow needs a coherent direction and enough room for adjacent lines to remain distinct. At the arch, the design needs a turn that belongs to the face. At the tail, fewer marks often carry the taper better. Each decision begins with the brow itself, then informs the needle, machine response, and training exercise.
This guide follows a design from consultation to healed review. It compares the tools by the jobs they do and gives educators a way to observe movement on practice models. Professional work on people requires supervised training and an appropriate clinical and infection-control boundary. The synthetic drills are meant to make decisions about design and machine handling visible.
Contents
- What machine hair strokes are
- Consultation and balanced mapping
- Brow head body arch and tail
- Stroke architecture and negative space
- Needle selection for fine brows
- Choose a machine for the station
- Angle wrist motion and control
- Three studio briefs and training progression
- Troubleshooting and healed review
- Frequently asked questions
What machine hair strokes are
Start with the visual result
Hair strokes are visible marks arranged to suggest natural brow hairs. The artist controls the direction, curve, placement, and relative prominence of those marks in the drawing. The same label may describe several ways to produce a hair-like look. A client who asks for nano brows might want a quiet fill in a small gap. Another might bring a photo of a full structured brow. Ask both to point out the features they want preserved. That conversation clarifies the brief before you choose the pen or needle.
Separate machine work from manual microblading
Machine hair strokes use a powered handpiece and a compatible needle cartridge. Manual microblading uses a hand tool with a row of fine needles and a different movement. They may aim for a similar visual impression while using different equipment and working methods. A training exercise should name the exact method being taught so students understand why a movement belongs to that exercise. Nano is also an industry term. A supplier's nano description can sit beside multiple actual diameters. Order using the metric diameter, configuration, and interface for the exact cartridge.
Know where powder and combination work fit
A powder-style design uses a soft field of color or a visible gradient. A combination design can use separate hair-like marks in one zone and a shaded field in another. A client who wants stronger continuity through a gap may prefer one of those visual results. Show how the density changes in a mock-up. The useful question is whether the client wants individual marks to carry the brow shape or wants a continuous, soft field to support part of it.
| Brief | Dominant visual structure | What to inspect in the design | Tool planning focus |
|---|---|---|---|
| Machine hair strokes | Individual directional marks | Separation, direction, and the role of native hairs | Single-point or small compatible liner compared on the specific mark |
| Powder-style brow | A soft continuous field or a gradient | Boundary softness and variation in density | Compatible shading choice that fits the planned area |
| Combination brow | Distinct marks plus a tonal field | The junction where the two visual treatments meet | Distinct fine-mark and coverage jobs |
| Manual microblading | Individual marks made with a manual tool | Alignment with the hair direction and overall spacing | Separate training and equipment matched to that technique |
Consultation and balanced mapping
Observe the brow before drawing on it
Look at the brow in a relaxed expression and in the client's usual viewing posture. Identify where hairs are dense, where the outline is already supported, and where the visual gap actually sits. Notice the direction on both sides. The same client may have a front that stands upright on one side and leans inward on the other. The first design proof should respond to that observation. A mirrored layout can miss a genuine difference in flow.
Use a map as a reference for discussion
Mark the approximate head, arch and tail and inspect the relationship to the eyes and brow ridge. A measuring tool helps you locate differences and communicate possible changes. Look at the whole face again after making the reference marks. Consider what changes when the client smiles or raises their brows. Balance may mean preserving a small difference rather than shifting an entire brow outside the existing hair to meet a reference line. Ask the client which differences they already notice and which one they want you to address.
Clarify the boundaries of a design-only consultation
Review the client's goal, existing pigmentation, previous PMU or removal, and how their natural hair behaves. A pre-existing saturated field can make fine separate marks hard to see even if the new layout is attractive on paper. Where the client reports a skin condition, unusual reaction history, or a concern outside your training, follow professional screening and referral procedures. A better needle or motor cannot create room in a crowded visual field or answer a question about skin health.
Get agreement using two legible proofs
For a sparse gap, prepare one conservative map showing only essential accents and another with a fuller visual treatment. View both at a conversational distance, then examine the opening between the marks. Ask the client to describe what looks different in their own words. For a fuller brow, compare how each proof carries the arch and tail. A clear agreement about density gives you a better design reference at review than a single photograph viewed close up.
Brow head body arch and tail
Head: establish openness and directional variation
Look for a group of hairs that sets the front's direction. In a sparse head, an upright or lightly leaning mark can bridge a gap when it follows that direction and leaves a visible margin. Use several slightly different lengths in the drawing. Check what happens if you remove the innermost mark. If the brow still reads clearly, that space can be part of the design. A dense, straight front boundary often makes the brow look more graphic than the client intended.
Body: connect neighboring hairs into a coherent flow
The central body gives the brow visual continuity. Identify a few main lines that connect the front to the arch. In the drawing, check for repeated intersections where upper and lower directions meet. A small group of close intersections can create a dark point even when each individual mark is fine. Give the lines room to approach one another without turning into a block. Check how existing hairs help with this job before adding more strokes in the sketch.
Arch: distribute the turn across a zone
Treat the arch as a short transition rather than a single peak where every mark changes direction. A sudden bend in several adjacent lines can look like a row of hooks. Sketch three curves that gradually change orientation across the zone. Use the client's hair and structure to decide whether the visual turn should occur earlier on one side. When comparing two layouts, look for a clean transition on both sides from the normal viewing position.
Tail: protect taper without overfilling
The tail often has the least room for multiple marks. It also has a strong effect on the overall balance because of where it ends. Sketch the longest useful line first. Add a supporting mark only if it gives the taper a clearer direction. Compare one short tail and one slightly longer tail against the whole face. When the design needs more definition, a cleaner termination can help more than another parallel line squeezed into the same zone.
| Brow zone | Main design job | What to look for in native hair | Frequent design problem | Useful sketch correction |
|---|---|---|---|---|
| Head | Open beginning and gentle direction | Upright, inward, or changing growth | A straight dense front edge | Remove one repeated mark or vary length |
| Front body | Connect the beginning to the main shape | First consistent flow direction | Parallel bars that look stamped | Introduce a small change of curve and interval |
| Central body | Carry density while keeping separation | Dense clusters and natural overlaps | Several lines crowd a single junction | Simplify a crossing and retain open channels |
| Arch | Make the direction change gradual | Natural turn and ridge position | Multiple sharp hooks at the peak | Spread the turn across neighboring curves |
| Tail | Finish with a visible taper | Available hairs and a natural endpoint | Parallel lines fill the narrow tip | Shorten or remove the lower-priority mark |
Stroke architecture and negative space
Give the drawing a hierarchy
Choose the few marks that would remain if you had to reduce the design. Those marks show the brow's main direction and shape. Then add support strokes where there is a visible role for each one. A small group of strong accents can make the area look dense enough without filling every opening. For a student, start with the supporting strokes absent. Ask which new stroke is necessary and why. That question tests design judgment alongside hand control.
Look for spaces that should stay open
View the sketch at actual size and circle the tightest interval. On a sparse front, check the region near the first and second marks. At the arch, look for two adjacent curves that funnel into the same space. At the tail, compare the appearance of the planned pair against the simpler one-stroke end. Leaving a deliberate space can preserve the appearance of individual hairs. The task is to make the empty interval look intentional in the overall shape.
Compare density as a visual effect
Density depends on how many marks there are, how wide they look, the difference in value between them and the background, and how they overlap with existing hair. Count alone gives a partial answer. Put a reduced print of the sketch beside a photograph of the natural brow where consent and studio practice allow. If the natural hair already provides the contrast the client wants, remove new marks from that zone in the proof. Keep the strongest contribution in the area where a genuine gap remains.
Needle selection for fine brows
Start with the role of the 0601RL
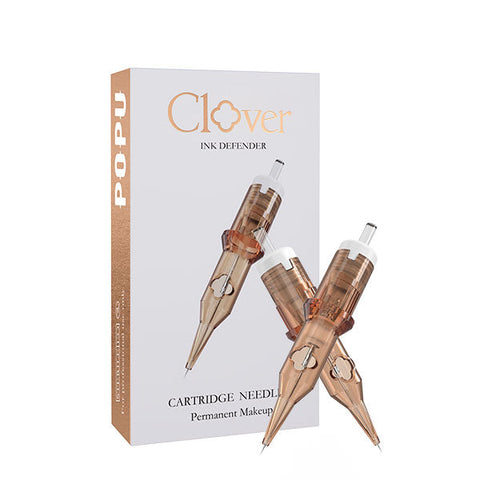
The Pinky Pro 0601RL, 20 cartridges has a single 0.20 mm point and gives you a fine footprint to assess for discrete marks. Consider it when the design asks for a sparse front accent or a fine turn that has its own clear space. Review the tip profile and machine compatibility for the exact variant. A single point puts the visible continuity of a stroke on the artist's control. If a learner can make a straight mark but loses the curve, isolate the curve in practice before changing the cartridge.
Compare a small grouping where the job changes
The Pinky Pro 0403RL, 20 cartridges groups three 0.18 mm points into a liner layout. Each wire is smaller than the wire in the cited 0601RL, yet the three-point assembly presents a different footprint. Compare it when a shape in the design needs a more defined edge. The two models give a useful lesson about geometry. Read wire diameter, count, arrangement, and taper independently. Evaluate the mark at actual size to see whether the grouped footprint fits the area.
Stock for the exercise you teach
A course that spends its first lessons on fine lines may standardize around one compatible single-point model. A second model belongs in the kit if the curriculum gives it a separate role students can see. Put one short curve and one more defined line beside the course map. Show what a student should observe about continuity and separation in each. Confirm package integrity and intended use for the exact cartridge, follow the machine guidance, and use single-use products as directed. The ATTO permanent makeup needle collection offers other configurations once the course has a defined need.
| Choice | Point geometry or role | Best question to ask | Typical course use |
|---|---|---|---|
| 0601RL | Single 0.20 mm point | Can the small mark retain a visible, open interval? | Fine accents and curve drills |
| 0403RL | Three grouped 0.18 mm points | Does a more concentrated line fit the design space? | Compare a more defined edge with a single-point accent |
| Compatible round shader | Open grouping selected for coverage | Does the training brief include a soft tonal field? | Separate coverage exercise for a combination design |
| Two identical fine-point boxes | Same exact compatible variant | Are multiple stations repeating the same exercise? | Consistent demonstration setup across learners |
| Alternate taper within a verified family | Same general footprint with another point profile | Is the taper the actual variable to compare? | A controlled exercise after basic motion is repeatable |
Choose a machine for the station
Compare the exact dual-battery packages
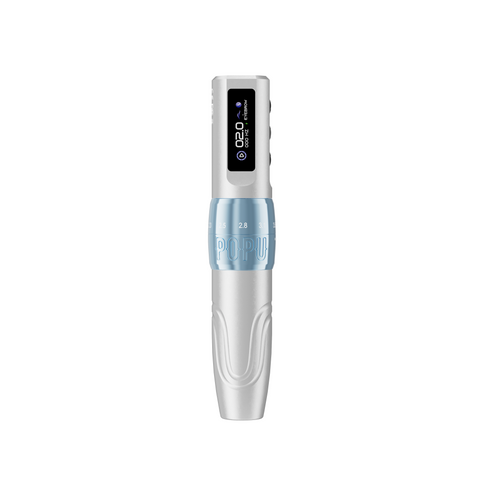
The Black Mini DIVA Pro with two batteries combines a 24 mm body with two memory modes for electronic settings and six mechanical stroke positions. The Black U1 with two batteries has a published body diameter of about 22 mm and six mechanical stroke positions over the same 2.0–3.5 mm range. For a new room with artists who value quick access to familiar electronic settings, the Mini DIVA Pro is a strong option. For a second station already based on U1, the matching U1 package gives the artist the same shape and adjustment approach.
| Decision dimension | Black Mini DIVA Pro dual-battery | Black U1 dual-battery | What changes in the room |
|---|---|---|---|
| Mechanical stroke | Six positions, 2.0–3.5 mm | Six positions, 2.0–3.5 mm | Both allow same-pen response comparisons |
| Battery package | Two 800 mAh batteries | Two 850 mAh batteries | Each provides a charged spare when the studio plans the handoff |
| Published body diameter | 24 mm | About 22 mm | Compare grip and sight line on a representative exercise |
| Cartridge interface | Standard universal style | Standard universal style | Verify the exact model and cartridge fit |
| Repeat setting workflow | Two electronic memory modes | Choose U1 for a familiar station workflow | Electronic settings and mechanical collar positions remain distinct |
Keep stroke, needle projection, and motion separate
The mechanical stroke describes the distance traveled by the drive through a cycle. Needle projection is the distance the needle extends from the cartridge tip in a specified position. Hand travel is the movement the artist makes along the intended line. Skin contact and tissue response involve additional factors. The stroke selector does not specify penetration depth. Compare a short and middle setting on a synthetic curve with the same grouping and setup. Look at how easily you can follow the curve and see the mark end. Choose the setting that serves the exercise using the machine's documentation and the instructor's feedback.
Choose spare power for the schedule
In an academy, one handpiece may go from instructor demonstration to repeated exercises without a long charging window. A dual-battery package allows a charged spare to be available at the changeover. For a studio that adds a second bench, consider who shares it, whether the first machine's handling is already familiar, and whether the charger is accessible during appointments. The published capacities describe the batteries in the specified kits. Actual runtime varies with the setup and use. Buy the spare for the handoff it supports and choose the pen itself for the grip and control you prefer.
Angle wrist motion and control
Teach what a 90-degree reference describes
A 90-degree reference describes a tool axis perpendicular to the local surface. On a flat synthetic sheet, an instructor can show that relationship from the side. On a curved model, the local surface direction changes as you move. An angle that appears upright to the table may no longer be perpendicular to the small area under the tip. Use a flat drill to help learners see the geometry, then move to a curved trainer to observe how the relationship changes. The reference explains orientation. It does not prescribe a universal live-skin angle, pressure, or depth.
Observe the curve before changing the machine
Have the learner trace the intended curve with a drawing tool before using the handpiece on a practice surface. Compare where the fingers begin guiding the curve and where the wrist starts to steer. A sudden wrist swing can make the end of the line turn into a hook. Try a shorter section of the same curve and compare the ending. The learner can also reposition the practice sheet so the next movement is comfortable and visible. This is a movement observation exercise. A qualified instructor can evaluate the learner's live technique in the appropriate setting.
Watch starts and stops as separate skills
Use a visible reference dot or drawn guide on synthetic material. Have the learner approach the start of the guide, follow a short curve, and end at a clear location in the design. Review the first third and final third of the mark separately. An even middle with a heavy beginning calls for an exercise focused on the start. A hook only at the end calls for a curve and release comparison. Evaluate each observation before changing the needle, grip, and machine setting together.
Progress from flat movement to a curved trainer
The ATTO A4 hair-stroke practice sheet gives an academy a flat surface for comparing sets of short marks. Move to a stable curved trainer once a learner can reproduce the directional changes on the flat sheet. Make the target behavior explicit. The student should keep the intended line visible, move through the curve without a sudden correction, and preserve the space next to the neighboring mark. Synthetic materials help make those movements observable. Live training adds a different set of professional and tissue considerations.
Three studio briefs and training progression
Brief one: sparse front with a full body
A client has a dense central brow and a small opening at the front on one side. Draw the existing hair direction before adding an accent. In the conservative proof, add just enough to connect the front to the body. Make the fuller alternative by adding one more candidate line. View them at conversational distance and ask which one matches the client's goal. A fine compatible single point is a reasonable tool to compare for the isolated mark. In the lesson, use the same small shape to see whether the learner can preserve the open space beside the leading line.
Brief two: an arch with a steep turn
A learner's drawing has three consecutive marks that all hook at the top of the brow. Compare it with a version that turns through several neighboring positions. Place the sketch over a clean curved training form and look from the side and front. If the drawn turn already looks sharp, change the design first. If the draw-through is smooth but the practice mark hooks, have the learner show the hand and wrist movement in a short guided exercise. For machine selection, keep the same grouping and compare the feel of two supported stroke positions after the design and motion are clear.
Brief three: a tail with earlier pigmentation
A client wants the tail to look sharper and has previous PMU near the intended endpoint. Show where the existing field already carries visual weight. New individual marks may be difficult to distinguish in that area. A conservative proof can improve the shape with a small visual adjustment and protect the open space at the tip. A fuller proof shows how additional marks could make the tail look heavier. Discuss professional assessment when previous treatment changes what can be done. A stronger grouping earns its place only if the design has a clear edge for it to carry.
| Training stage | Exercise | What the instructor observes | Move on when |
|---|---|---|---|
| Drawn directional map | Sketch the existing head, body, arch, and tail flow | Zone changes and visual balance | Each planned mark has a visible purpose |
| Flat short marks | Repeat one short curve and one line end | Continuity, stopping point, and hand visibility | Starts and ends are readable across several examples |
| Adjacent curves | Pair two lines with intentional open space | Spacing through the bend | The two lines remain distinct at actual size |
| Curved model | Repeat the pattern on a supported form | Local angle reference and wrist movement | Learner can describe and show the change in orientation |
| Complete design proof | Work through an entire synthetic brow map | Density hierarchy and silhouette | Head, arch, and tail read together |
| Supervised live progression | Follow academy and applicable professional requirements | Readiness, infection control, and live feedback | The qualified instructor determines readiness |
Troubleshooting and healed review
Identify the first stage that shows the problem
Place the drawn proof, the training example, and the review photographs side by side when available. If a gap was already tight on the map, open it before comparing different tools. If the sketch stays open but the student crowds the line near the arch, break out the curve and assess visibility and motion. If the issue appears only after changing the handpiece or cartridge, confirm setup and fit and compare the same exercise on the familiar setup. That sequence helps you locate a cause without changing an entire workstation.
Review healed design and symptoms as separate questions
With consent, use consistent light and camera distance to examine the overall design and then the specific openings you wanted to preserve. Look at the relation of the new marks to the client's existing hair. If the head is visually dense, compare it with the agreed proof and see whether the planned interval was large enough. A photograph can support a design review. Unexpected or persistent changes in the skin deserve appropriate professional or medical assessment through the studio's referral process.
Make the next lesson answer one question
Pick one observation. For a head that appears too graphic, compare the original map with one mark removed. For a consistent hook, repeat a short curve with better visibility of the endpoint. For the workstation that stops between repeated lessons, review whether a charged spare is accessible. Repeat the exercise once with the intended change. Compare a full view and the specific area you set out to improve, then decide whether a different tool belongs in the next lesson.
| Observation | Earliest useful comparison | First change to test | When to consider equipment |
|---|---|---|---|
| Dense straight head | Actual-size design proof | Vary lengths or remove a repeated mark | After the proof has a clearly defined gap |
| Lines appear stamped in the body | Hair observation and drawn directions | Give selected lines different curves | If a verified grouping cannot fit the planned detail |
| Several arch marks hook | Sketch and short synthetic curve | Spread the turn and isolate the ending | Compare mechanical response after the intended motion is visible |
| Tail looks heavy | One-stroke versus two-stroke proof | Simplify the finish | If the verified footprint is too large for the intended mark |
| Continuity changes after a cartridge swap | Same curve and compatible setup | Check exact fit and seating | Compare a known cartridge and the replacement variant |
| Station pauses between classes | Charging and demonstration schedule | Put a charged spare at the handoff | Choose a dual-battery package if the pause recurs |
Frequently asked questions
Is a nano brow defined by a specific needle diameter?
Nano brow commonly describes a machine hair-stroke service or visual style. Suppliers and training courses can use it for different equipment. Read the exact diameter, configuration, taper, and machine compatibility for the cartridge you intend to buy. Use the brow design to decide whether the footprint fits the mark.
Should the left and right hair-stroke maps be identical?
A pair of brows can look balanced while reflecting different hair directions and facial movement. Map both sides and inspect them with the client's face relaxed and in natural expression. Match the visual weight and purpose of the main regions. Adjust each side's flow to the structure and hair you observe.
When is a Pinky Pro 0601RL a useful first choice?
Consider it when your main exercise involves a discrete, narrow mark, such as a fine accent near a sparse head. It has one 0.20 mm point. Confirm the exact machine fit and choose the practice curve before comparing it with another geometry. A more prominent contour can justify a separate grouped option.
Why can three 0.18 mm points make a different mark from one 0.20 mm point?
The metric value describes each wire. Three wires form a group with a distinct arrangement and working footprint. The smaller individual diameter can still belong to a broader group. Compare the two options on a line that has a visible role in the overall design and inspect the space beside it.
Should I buy the Mini DIVA Pro or U1 for a new bench?
Choose Mini DIVA Pro when the 24 mm grip and electronic memory workflow suit the way you move between tasks. Choose U1 when you prefer its published slimmer diameter or want the bench to match a U1 already in use. Compare the dual-battery versions when the schedule calls for a charged spare.
Does the 90-degree reference tell me how deep to work?
It describes an angle relative to a local surface. It does not describe tissue penetration or a fixed approach for all areas. Use a flat trainer to understand the geometric reference and a curved trainer to see how it changes. Live work requires appropriate supervised training and assessment.
What if a client brings an inspiration photo with many more strokes?
Ask which visual features they want. It may be a soft front or an extended tail rather than the exact number of strokes in the photo. Show a conservative proof and a fuller proof at actual size. Compare the gaps and overall weight against their existing hair and facial movement.
How should an academy teach the arch without encouraging hooks?
Have students draw several adjacent curves that distribute the directional change across a small zone. Let them rehearse a short section on a flat model, then move to a curved model. Compare the planned direction and where the wrist starts steering. Evaluate the turn at actual brow scale.
Can a different cartridge fix a crowded healed appearance?
Start by comparing the healed appearance with the agreed proof and the original spacing. A tool with a different footprint can help on a specific future mark, while the design itself may need wider separation or fewer marks. Professional assessment is appropriate when the concern involves unexpected or persistent skin changes.