

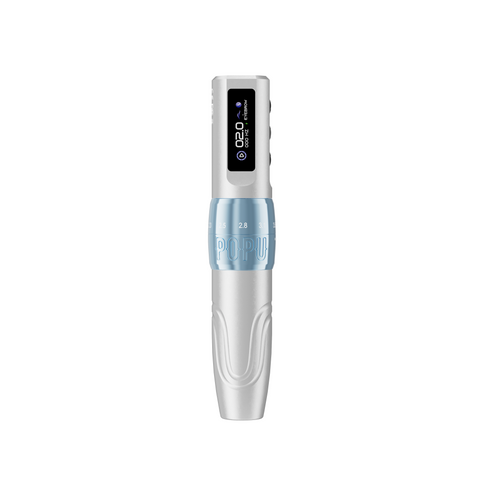
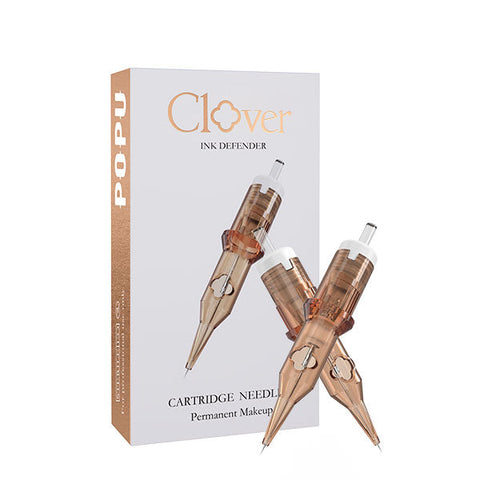


Choose a cartridge for its interface, geometry and working task before comparing housing features. Start with Pinky Pro 0601RL, 20 cartridges for a fine PMU single-pin line on a compatible universal machine. Add Pinky Pro 1003RS, 20 cartridges when the same station needs compact shading. For tattoo contours and curved-edge shading, start with Thunder Pro 0803RL and Thunder Pro 1007RM in the respective 20-cartridge boxes. Choose the documented Clover liner when the course or studio deliberately works with that cartridge series and its exact taper and grouping.
The housing lets the moving assembly follow a defined path and brings the liquid to the working end. The membrane adds a barrier between the wet end and the machine side in designs that use it. The geometry determines how many points reach the work and how they are arranged. Each part has a distinct job. A useful comparison holds two of those jobs steady while testing the third.
On this page
- Follow the cartridge from drive to tip
- Understand the housing and clear working view
- What the silicone membrane does
- Ink flow at the working end
- Match cartridge families to the mark
- Run a controlled bench comparison
- Diagnose irregular delivery and motion
- Buy and standardize by working role
- Cartridge engineering FAQ
Follow the cartridge from drive to tip
Identify the connection first
A cartridge starts at its attachment to the machine or grip. The shell needs to seat in the compatible interface and the moving assembly needs to engage the drive as the equipment maker describes. A close-looking interface is a weak basis for ordering a box. Verify the intended connection for the machine and the exact cartridge series. A confirmed universal connection can support a shared station when the machines in that station accept it. A threaded system calls for the specific matching interface.
Follow the moving assembly
Inside the shell, the drive transfers movement to the needle assembly. The cartridge's guides and tip help keep the points aligned with the intended path. Think about the motion at two levels. The machine supplies the drive, while the cartridge provides the fit and guidance for the selected grouping. If a set feels irregular, inspect the fit before assuming an issue with the motor. Then check whether the symptoms follow one cartridge or several compatible units.
Separate the guides from the working opening
The guides constrain the assembly within the cartridge. The working opening gives the points and liquid a path at the tip. Their geometry is related to the configuration. A wide curved magnum needs a working profile suited to its group. A single liner uses a much smaller working area. Choose the group for the mark first, then compare how the selected tip lets you see and manage that mark.
| Cartridge part | Mechanical job | Useful check | Purchase implication |
|---|---|---|---|
| Machine interface | Seats the cartridge in the intended grip | Confirm exact compatibility | Choose the documented interface before comparing tips |
| Drive contact | Receives the machine's motion | Inspect assembly and seating as directed | Use the cartridge on its intended machine |
| Housing and internal guidance | Support the moving assembly | Examine the cartridge before use | Compare models on compatible equipment |
| Working tip | Locates the group and supports delivery near the working end | Identify the opening and intended grouping | Match the tip to a line or field |
| Membrane, where documented | Separates wet and machine sides in the design | Confirm the feature for the exact series | Choose the documented barrier as part of a complete setup |
Read the opening and the needle group together
A tightly arranged group and a wider working opening are not interchangeable descriptions. The group determines how the working points relate to each other. The opening provides the space in which that group travels and the region where liquid is available around it. An instructor can demonstrate the distinction with a fine round liner and a curved magnum on the same practice layout. The narrow liner provides a concentrated mark, while the curved group gives a wider pass. The comparison shows a change in the whole assembly. To isolate the opening itself, use two documented assemblies with closely matched grouping and taper.
Understand the housing and clear working view
Use transparency to make setup easier to see
Pinky Pro cartridges have a clear polycarbonate housing. A clear view lets you see the visible ink and moving assembly during setup and helps when you compare where liquid is held around the working end. It also helps instructors show a learner the difference between a tip that has been loaded and one where only the outside carries a bead. Look from the same angle each time. A bright reflection can look like fluid where the clear shell curves.
Read the material claim at the model level
Polycarbonate describes the material of the Pinky Pro shell. The needle pins serve a different job and are 304 stainless steel. Keep those claims with the corresponding part and product. For Thunder Pro or Clover, use the documented specifications of the exact grouping and range. A similar clear appearance across two products does not establish the same grade or internal design. Compare the way the tip and housing support the task instead of carrying a material statement from one range into another.
Choose a view that exposes the working edge
A fine liner often needs a clear view of where the short line begins and ends. A wider group needs a view of its contact footprint and the edge it leaves beside an open area. At the bench, examine a short straight mark and a curve under the same light. Note where the shell blocks or reveals the actual working point. This helps distinguish the usefulness of transparency from the shape of the tip itself.
What the silicone membrane does
Understand the membrane as part of the moving assembly
The silicone anti-backflow membrane in Pinky Pro is a flexible barrier built into the cartridge. It is designed to help limit fluid movement toward the machine side during normal operation. The assembly still moves repeatedly as the machine drives it. That makes the membrane a mechanical component as well as a barrier. Its geometry and material contribute to how it deforms in the cartridge. The useful product decision is whether the exact model documents the feature and fits the intended machine.
Separate membrane resistance from machine output
A membrane can contribute an elastic load as the assembly moves. Friction within the cartridge and fit at the drive also matter. An artist may feel a difference between two otherwise compatible cartridges, especially when comparing differently shaped groups. Start by comparing the same grouping and check the setup on a suitable synthetic surface. If one cartridge feels irregular, replace it with a fresh compatible unit before interpreting the feel as a difference between designs. Only compare machines after you have accounted for the cartridge and attachment.
Keep infection-control tasks distinct
The membrane serves the cartridge's barrier design. The wider hygiene process includes the equipment manufacturer's directions, the studio's barriers and handling controls, the condition of the individually packaged cartridge, and disposal through the appropriate process. An intact cartridge and the documented ethylene oxide sterilization of the supplied product are separate checks from the studio's routine. If there is a reason to suspect fluid reached the machine side, follow the studio's established response and equipment instructions before continuing.
Ask which membrane claim is actually documented
Silicone material, location, force, lifetime and backflow performance are different claims. A manufacturer may document the presence of a barrier without publishing a force curve or test conditions. Use the product information you can verify for the exact model. Choose Pinky Pro when you specifically want the documented combination of a clear PC shell and a silicone barrier. Compare Clover or Thunder Pro using their own documented features and the task that calls for their geometry.
| Question | What you can verify | What changes the decision |
|---|---|---|
| Does this cartridge use a silicone barrier? | Product documentation for the exact series | Select a range with the feature explicitly confirmed |
| Does it seat correctly? | Documented machine interface and physical check as directed | Match the machine or select the correct cartridge |
| Does the movement feel different? | Comparable grouping, same compatible machine and fresh samples | Isolate geometry and fit before attributing resistance |
| Is the supplied cartridge ready for use? | Package condition and relevant product instructions | Follow studio procedure and replace questionable units |
| What should happen after suspected fluid intrusion? | Equipment directions and the studio procedure | Pause the station and follow the appropriate response |
Ink flow at the working end
Follow liquid between closely spaced surfaces
Ink or pigment can wet the needle and the nearby surfaces of the tip. A small space between those surfaces can help retain and draw liquid through capillary action. Surface tension, contact with the material and geometry all influence that effect. The needle moves through this liquid environment as the cartridge operates. A useful studio observation is where liquid remains visible after loading and how that relates to the first mark on a suitable synthetic material.
Separate viscosity from surface wetting
Viscosity describes resistance to flow. Wetting describes how a liquid spreads on a surface. A liquid can resist moving quickly yet still wet a surface well. Another can spread readily but be held differently in a narrow tip. Compare one approved liquid in the same cartridge if you are testing a machine change. Compare two liquids only after you have established a stable setup and the product directions support the comparison. Keep any preparation or dilution within the applicable instructions.
Understand what a tip channel can change
A channel or opening can change how liquid reaches and sits near the working points. Its effect depends on shape, group size, loading and liquid properties. When documentation describes a specific channel, tie that feature to the exact cartridge that uses it. To judge the practical effect, compare how the working area fills and how the first short mark reads. A numerical flow or splash claim would require a defined test and actual measurements.
Diagnose a bead before assuming a feed problem
A bead visible on the outside of the tip is an observation. Look at where it forms and what changes after you follow the product's loading instructions on a fresh test. Compare the next short marks at the same size and orientation. If the first mark is heavy and the next two are clear, examine the loading and working end. If irregular delivery recurs through all three, check fit, condition, geometry and the documented preparation of the liquid.
Think in terms of replenishment between marks
A tip holds only the liquid available around its working area at that moment. A short line and a wider field can use that supply differently. In a synthetic comparison, look at the beginning, the middle and the end of one defined passage. If the line starts clearly and fades toward the end, repeat a shorter passage after following the documented loading routine. If the short passage remains even, the observation helps identify where the liquid or motion changes in the longer one. Do this before comparing a different grouping. A wider grouping changes both the way the points contact the surface and the amount of area covered.
Match cartridge families to the mark
Start with a PMU line and its shading companion
Choose Pinky Pro 0601RL for a fine line that uses a single 0.20 mm pin. Add Pinky Pro 1003RS when the work also calls for a compact round shader with three 0.30 mm pins. The pair gives one station a distinct narrow mark and a broader field. Both have documented clear PC shells and silicone barriers. Their different working widths serve different tasks, so use comparable configurations when the purpose is to isolate a housing feature.
Choose the Thunder Pro footprint for tattoo work
The 0803RL uses three 0.25 mm pins arranged as a round liner. Choose it for compact grouped lines on a compatible universal tattoo machine. The 1007RM uses seven 0.30 mm pins in a curved profile. Add it when a softened edge or compact tonal passage belongs to the design. Choose Thunder Pro 1007RM, Box of 10 for a focused trial of the same configuration. Choose the 20-cartridge box once the grouping has a regular job at the station.
Choose Clover by the exact taper and grouping
Clover 0601RLMT, 20 cartridges uses a single 0.20 mm pin and medium taper. Clover 0603RLMT, 20 cartridges uses three 0.20 mm pins and medium taper. These make a useful count comparison for an instructor when both are approved for the station. The wire diameter and taper category stay the same while the number and arrangement of working points change. Choose the single for a fine reference and add the three-pin group when the exercise calls for its grouped mark.
| Range and model | Geometry | Main role | Feature you can use in the decision |
|---|---|---|---|
| Pinky Pro 0601RL | One 0.20 mm pin | Fine PMU line | Clear PC shell and documented silicone barrier |
| Pinky Pro 1003RS | Three 0.30 mm pins in round shader | Compact PMU shading | Same documented shell and barrier features in a different grouping |
| Thunder Pro 0803RL | Three 0.25 mm pins in round liner | Compact grouped tattoo line | Grouped contact footprint for narrow contours |
| Thunder Pro 1007RM | Seven 0.30 mm pins in curved magnum | Compact fade or soft tonal edge | Curved working profile and separate 10- and 20-cartridge packs |
| Clover 0601RLMT | One 0.20 mm pin, medium taper | Fine PMU reference | An exact comparison partner to the corresponding three-pin option |
| Clover 0603RLMT | Three 0.20 mm pins, medium taper | Grouped PMU reference | Same nominal wire diameter and taper category as Clover 0601RLMT |
Keep a same-geometry comparison meaningful
A 0601RL and a 1003RS can be useful companions in a purchase. Comparing their marks says little about which shell is responsible for the difference. If the question concerns housing guidance or ink behavior, match the number of points and wire diameter as closely as the documented options allow. Include taper and arrangement in the comparison. If those differ, describe the result as a comparison of two complete cartridges. That is still a useful buying decision when the question is which complete setup does the desired work.
Match the work to the box count
A ten-cartridge trial of the 1007RM can serve a studio comparing the same curved group on a few short exercises. The 20-cartridge box is useful when that same group already has a recurring job. Keep the count decision separate from the grouping decision. For example, a studio may need a 20-cartridge liner box for regular borders and a smaller curved-magnum box while it evaluates a new soft-edge technique. Confirm the listed grouping and box quantity together before adding either to the order.
Run a controlled bench comparison
Prepare a repeatable test mark
Use a suitable synthetic sheet and products intended for that test. Prepare a short straight mark, a gentle curve and, when testing a shader, a compact field with one open edge. The straight mark helps you see an inconsistent start. The curve makes it easier to inspect the working edge from a second angle. The field gives a broader group a meaningful task. Use the same layout for both cartridges when they are being compared on that task.
Change one component and read the first marks
Keep the machine, compatible interface and working setup consistent. Use fresh cartridges and suitable separate supplies. Prepare the liquid according to its directions. Compare an initial mark and a short repeat. Where the first mark starts heavy, examine the loaded tip and try a fresh controlled sample. Where a change starts only after several marks, inspect the working end and confirm that the cartridge is seated as directed. The aim is a normal, repeatable studio comparison.
Inspect the shape at working distance
Look first from the position you use during work. Decide whether the line or field has the edge you wanted. Then look close to see where the change begins. If a visible line splits around a turn, compare the angle on a fresh short section. If a field is narrower than expected, check the grouping and how its working edge approached the area. Report what you can see before assigning the result to ink flow or membrane load.
Compare packaging and instructions at the same time
A bench check starts with the intact product packaging and the instructions for the machine and cartridge. Keep the known setup available for comparison. Use individual units according to their intended handling and disposal requirements. If a newly opened unit looks damaged or the working points appear out of alignment, set that unit aside and follow the studio's procedure. A fresh unit from the same documented configuration is a better comparison than attempting to alter the shell or needle assembly.
| Test | Main variable | Hold steady | Inspect |
|---|---|---|---|
| Same grouping, different supported models | Complete cartridge design | Compatible machine, liquid and mark | Visibility, repeat marks and normal seating |
| One versus three Clover pins | Pin count and arrangement | Diameter, taper category and the reference path | Separate fine mark versus grouped impression |
| 0803RL versus 1007RM | Grouping and intended task | Comparable synthetic setup | Compact contour versus soft field |
| Liquid comparison | Documented liquid choice | Cartridge, machine and mark | Loading and repeat appearance |
| Fresh repeat of one unit | Individual cartridge | Exact documented configuration | Whether the behavior repeats |
Diagnose irregular delivery and motion
If the first mark is heavier than the rest
Check the amount of visible liquid at the tip and compare the loading routine with the instructions for the cartridge and liquid. Use a small repeat on a synthetic surface. If the next mark is clear, the opening may be holding more liquid at the start than the mark needs. A first-mark difference is a useful signal about preparation. If the pattern returns through multiple marks after a fresh setup, check the grouping, fit and the documented preparation again.
If the group feels rough or stops moving smoothly
Pause and inspect the seating and visible condition as directed. Use a fresh compatible cartridge to check whether the issue is isolated. A symptom that follows one unit calls for handling that unit through the studio's quality process. A symptom that repeats across compatible units puts the next check at the machine or grip. Keep the suspect setup out of use until the issue is understood according to the equipment instructions.
If a fine line looks intermittent
Find where the gap first appears. Compare the straight mark and curve at the same size. If the break follows the same angle, consider the visibility and access at the working end. If it occurs throughout the sample, inspect seating, liquid preparation and the condition of the cartridge. Try one fresh unit from the same configuration before changing group size. A different size changes the mark, which makes the original problem harder to isolate.
If there is fluid where you did not expect it
Stop the comparison and inspect only as allowed by the equipment directions. Visible fluid on the outside of the working tip has a different significance from suspected fluid on the machine side. Use the studio's hygiene and equipment procedure for suspected intrusion. Keep the product, machine and symptom distinct when you contact the supplier. The exact series and machine connection help them identify the relevant instructions.
| Observation | First check | Controlled repeat | Purchase or service decision |
|---|---|---|---|
| Heavy first mark | Loaded tip and preparation | Same layout on synthetic material with a fresh setup | Keep the configuration if repeat marks become clear |
| Rough movement | Seating and visible condition | Fresh compatible unit | Check the machine if the problem repeats |
| Gap at a turn | Working angle and view of tip | Same curve and same grouping | Change geometry only if the mark calls for it |
| Weak shaded field | Group and contact footprint | Same group beside a clear boundary | Choose a wider documented grouping when coverage is the real need |
| Suspected intrusion | Machine-side concern and equipment directions | Follow the approved procedure | Seek model-specific support before reuse |
Describe the failure in terms a supplier can use
A report of inconsistent flow can mean a dry-looking tip, a heavy first mark or a visibly interrupted pass. Describe which one occurred and whether the issue followed the same cartridge, the same machine or a particular liquid. Include the exact configuration and interface. A short synthetic repeat under the same conditions gives the supplier a much clearer question than a report that the cartridge felt different. Keep clinical and hygiene concerns within the studio's established reporting process.
Buy and standardize by working role
Equip one PMU station for its actual appointments
Start with Pinky Pro 0601RL for a narrow single-pin reference. Add Pinky Pro 1003RS when the station also needs compact shading. If the class or studio has selected Clover, start with the exact 0601RLMT and add the matching 0603RLMT to compare the grouped mark. Choose one clear set of roles for each station. A family can offer several useful options without every option belonging in the first order.
Equip a tattoo station around its contours and fields
Choose the Thunder Pro 0803RL for compact grouped contours and the 1007RM for curved-edge shading. Order the 20-cartridge boxes if the work uses the groupings regularly. Use the ten-cartridge 1007RM when the studio is introducing that exact grouping for a specific design task. If the station needs only a liner at the moment, begin there and add the curved magnum when the shaded field belongs to a scheduled design.
Teach the purchasing distinction in one short demonstration
Set a fine line and a compact shaded patch beside each other on the same practice layout. Show which features were produced by changing the grouping. Then hold the grouping steady for a housing or liquid comparison. Ask learners to name the observation before naming the part they think caused it. A student who can describe a clear start, a clean edge or a recurring break can make a more precise purchase decision than a student choosing solely by the shell appearance.
Cartridge engineering FAQ
What should I choose before looking at the cartridge housing?
Choose the documented machine interface and the grouping required by the mark. Compare the shell and barrier features within the suitable options.
Why is a clear shell useful?
It gives you a view of visible ink and the moving assembly around the working end during setup. Use the same lighting and angle when comparing how much that view helps.
What does the silicone membrane do?
In the documented Pinky Pro design, it acts as a flexible barrier intended to help limit fluid movement toward the machine side. Follow the studio's wider hygiene and equipment process alongside that feature.
Does a cartridge with a membrane change how the pen feels?
A flexible component can contribute mechanical load. Fit, guidance, machine behavior and grouping can contribute too. Compare the same grouping on the same compatible setup before interpreting the difference.
Can I choose by viscosity alone?
Compare the liquid with the intended cartridge and application. Viscosity affects flow, while wetting and the geometry around the points help determine where liquid sits.
Which pairing should I buy for a fine line and a soft PMU field?
Choose Pinky Pro 0601RL for the fine single-pin line and 1003RS for compact shading on a compatible universal machine.
Which Thunder Pro should I buy for a short tonal transition?
Choose the 1007RM for a compact curved-edge field. Try the 10-pack for a focused evaluation or choose the 20-pack when the grouping is established at the station.
How do I compare Clover 0601RLMT and 0603RLMT?
Use the same reference path. Both are 0.20 mm medium-taper options. The one-pin and three-pin arrangements let you examine how group count changes the mark.
What should I do if a cartridge binds or looks damaged?
Pause and follow the equipment and studio instructions. Use a fresh compatible unit for the next controlled check and keep the suspect item out of use.